Add Timestamped Commentary to Video Modules
Add comments to videos and sync them to appear at specific times in the video. Deleting timestamped comments in videos.
March 28, 2022
Why Use Timestamped Commentary?
Timestamped commentary allows the admins or instructors to communicate with learners as the learner watches videos. Videos are inherently a more passive form of eLearning. Comments can be used to increase engagement and knowledge retention by focusing learners on specific sections of the videos, asking learners questions to consider, or providing them links to additional information.
Note: Commentary can only be added to videos uploaded as File modules. You cannot add commentary to YouTube videos or other videos accessed by a link.
How to Add Timestamped Commentary
Step 1: Open Video Module Editor
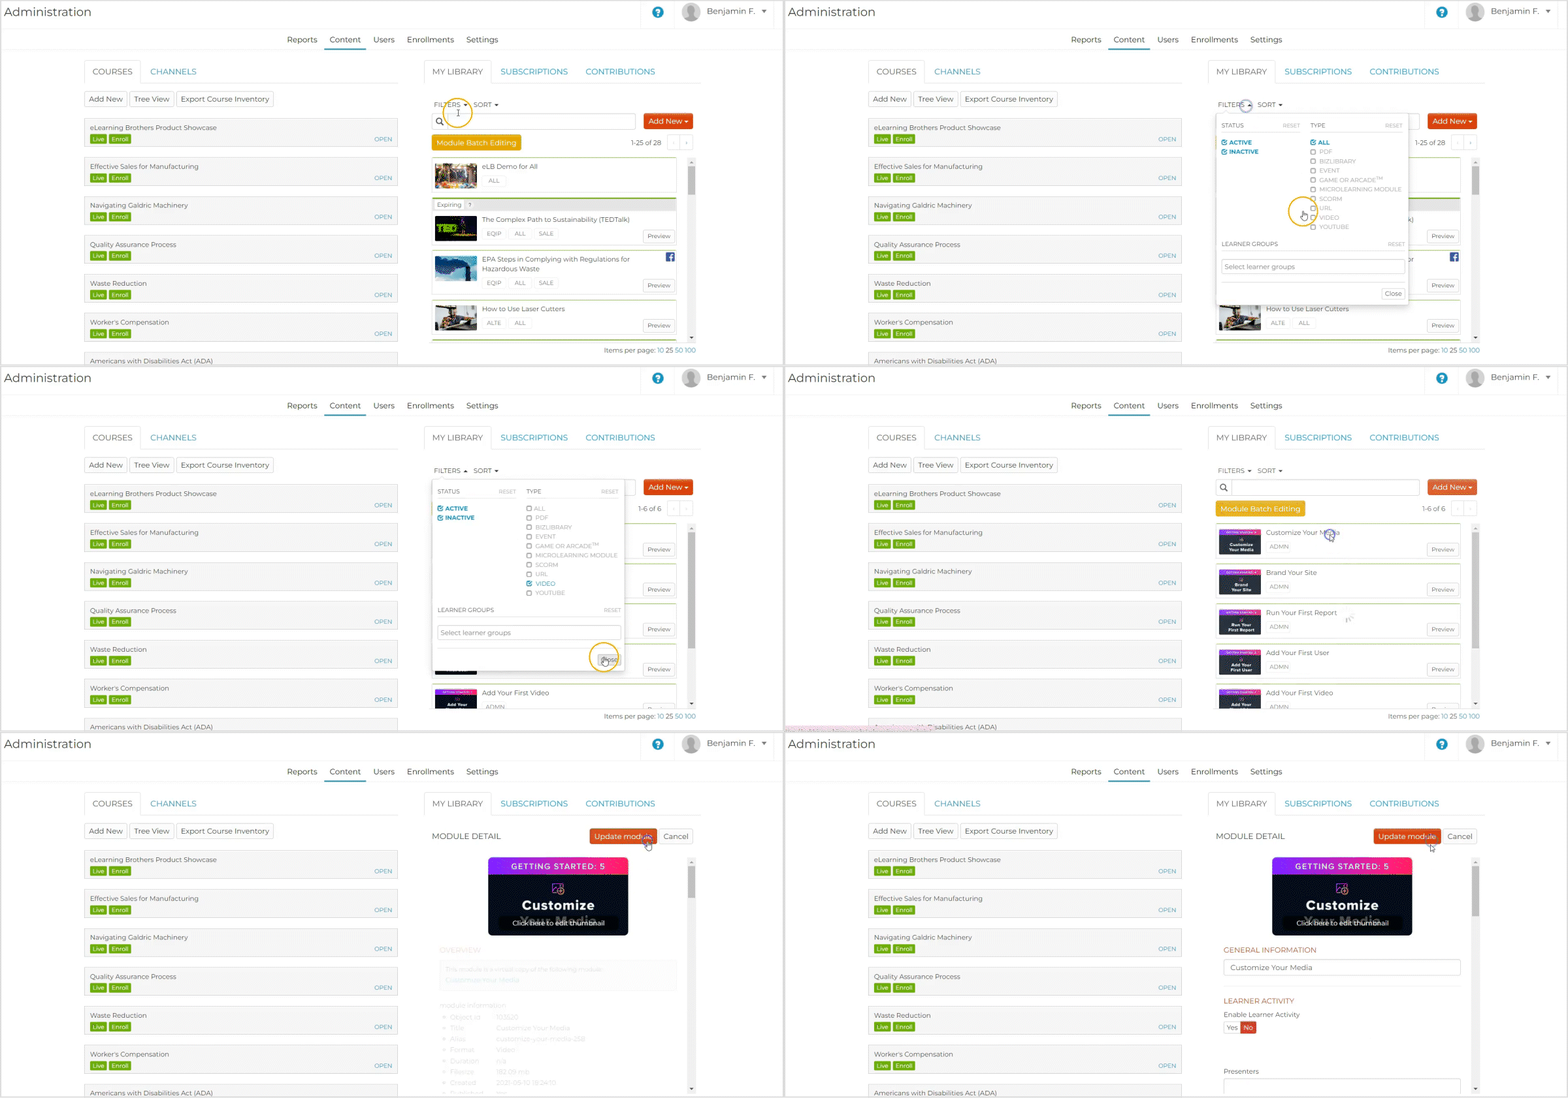
Navigate to the “Content” tab of the Admin Portal. Select a video module you wish to edit, and then select “Edit”.
Note: You can use “Filter” to select only video modules to narrow your search.

Step 2: Open “Add Commentary” Window
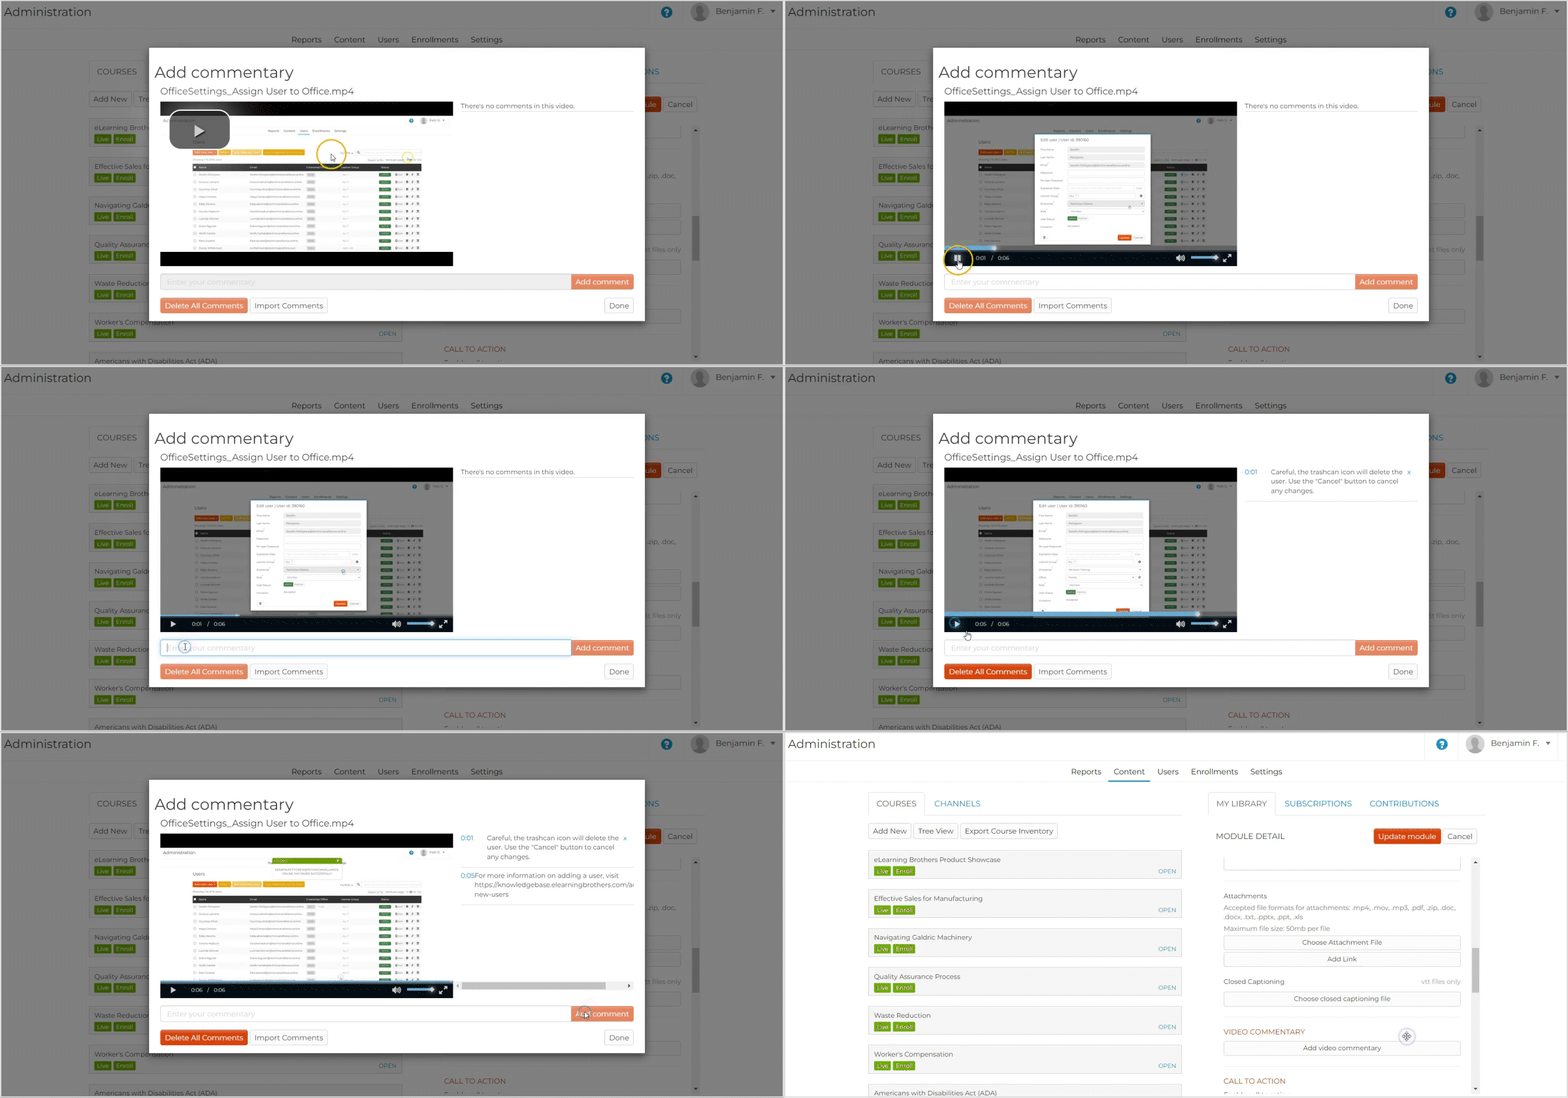
Scroll down and select “Add Video Commentary”.
Step 3A: Add Comments Using the Rockstar Learning Platform
Select the “Play” arrow to start playing the video. When the video reaches the time you wish to add a comment, select the “Pause” button. Type the comment you wish to add in the text entry field and select “Add Comment”.

Step 3B: Import Commentary Using Excel Template
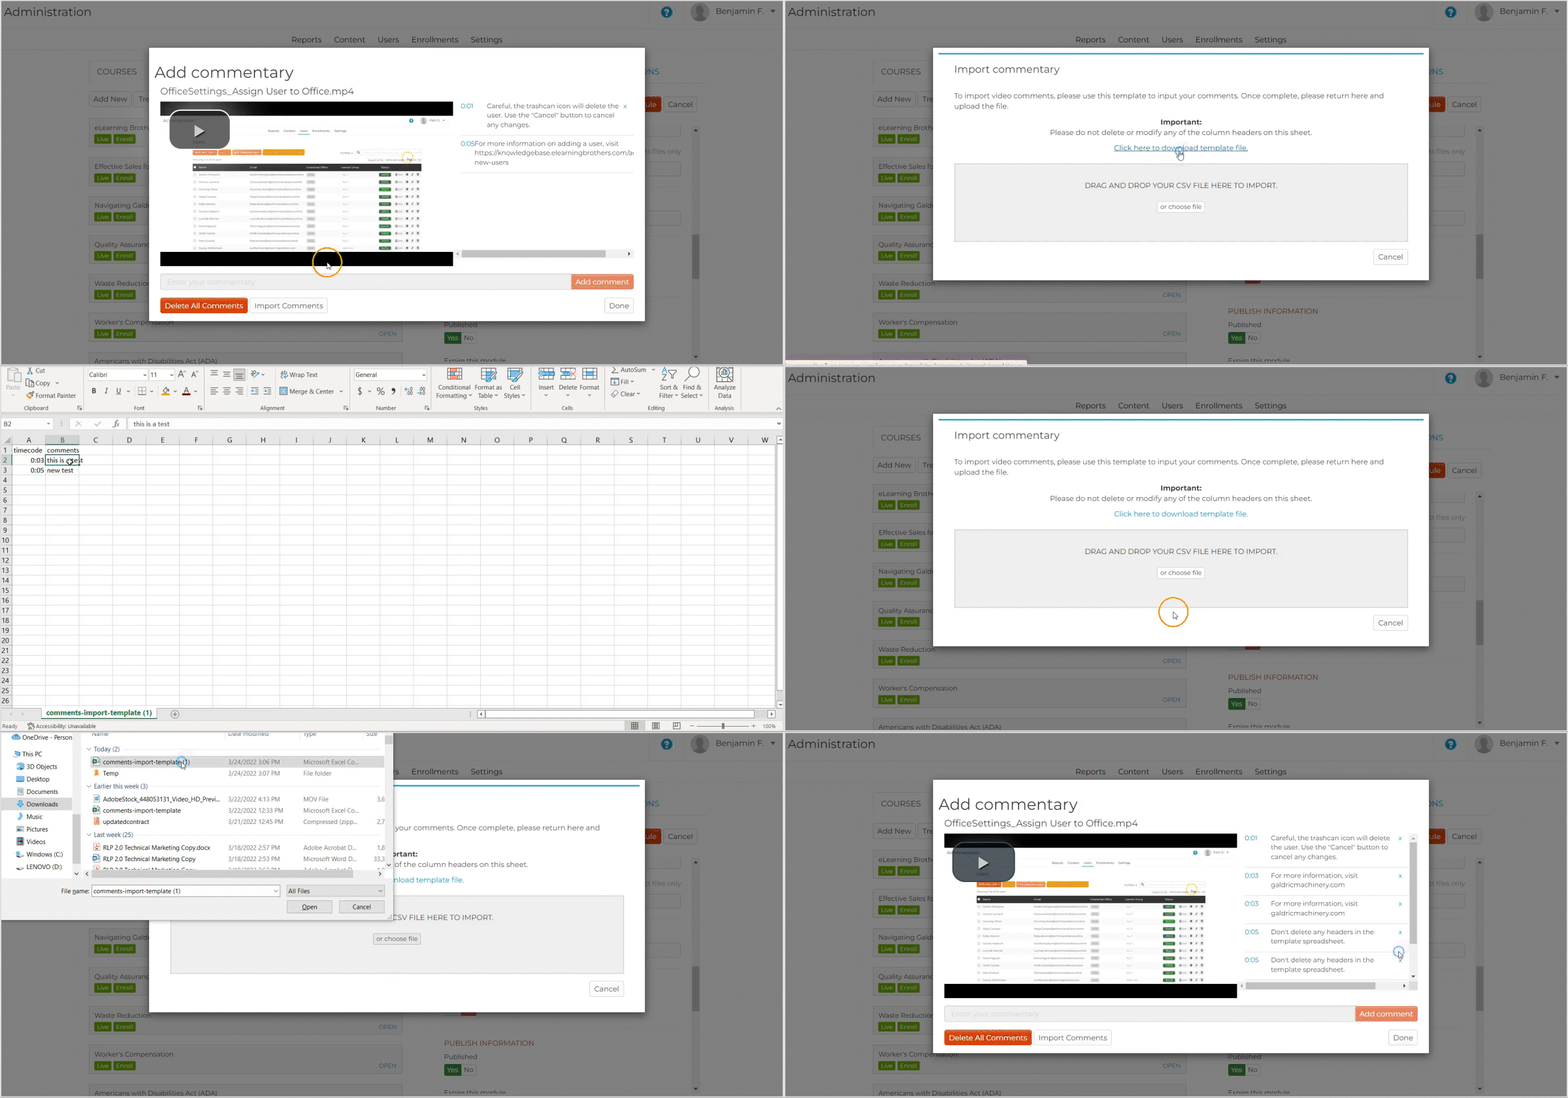
Select “Import Comments” at the bottom of the window. Select “Click here to download template file” and fill out the downloaded spreadsheet. Using this method, you can specify the exact timecode to go with the comment without skipping through the video. Drag and drop the Excel file or select “or choose file” to select the spreadsheet from your computer files.

Errors when Importing Commentary: If there was an error with uploading the comments, such as when the timestamp in the spreadsheet is beyond the length of the video, the platform will display an error message. This message will show which lines in the spreadsheet are causing the error and why the error occurred.
Step 4: Save Changes
Select “Done” to save the commentary. Then select “Update Module” to finalize your changes.
Delete Video Commentary
Open the Commentary Editor by following steps 1 and 2 of this article. Select “Delete All Comments” to delete all comments on the video. Or select the “x” next to specific comments to delete those comments. Once the comments are deleted, select “Done”. Then select “Updated Module”.
Caution: Once all comments have been deleted, it cannot be undone. A warning will appear when selecting “Delete All Comments” asking to verify that you wish to take this action.
Learner View of Video Commentary
When a learner selects the Show Commentary button, the comments will appear in a panel to the right of the video. The comments will appear in sync with the timestamp unless the user selects “Show all comments” to see them all at once.
