Use Facebook-Powered Commenting to Allow Users To Comment on Modules
Enable module commenting from Settings, Connect a Facebook account with the Rockstar Learning Platform, Enable for individual modules or across the platform,
March 28, 2022
Note: All comments will only be posted on the Rockstar Learning Platform and will not be posted on Facebook.
Caution: All learners must log in to Facebook in order to leave a comment on a module. If learners do not want to link their personal accounts, administrators can create a dedicated Facebook account for all learners to use when commenting on the Rockstar Learning Platform.
The “Facebook Commenting” feature gives administrators the ability to add a comment section below any module on the platform. Turning this feature on will activate a new "Facebook commenting" toggle for each module of your Content Library. For modules with this setting toggled “on”, learners will be able to comment and see other learners’ comments below the module.
Linking a Facebook account to the Rockstar Learning Platform
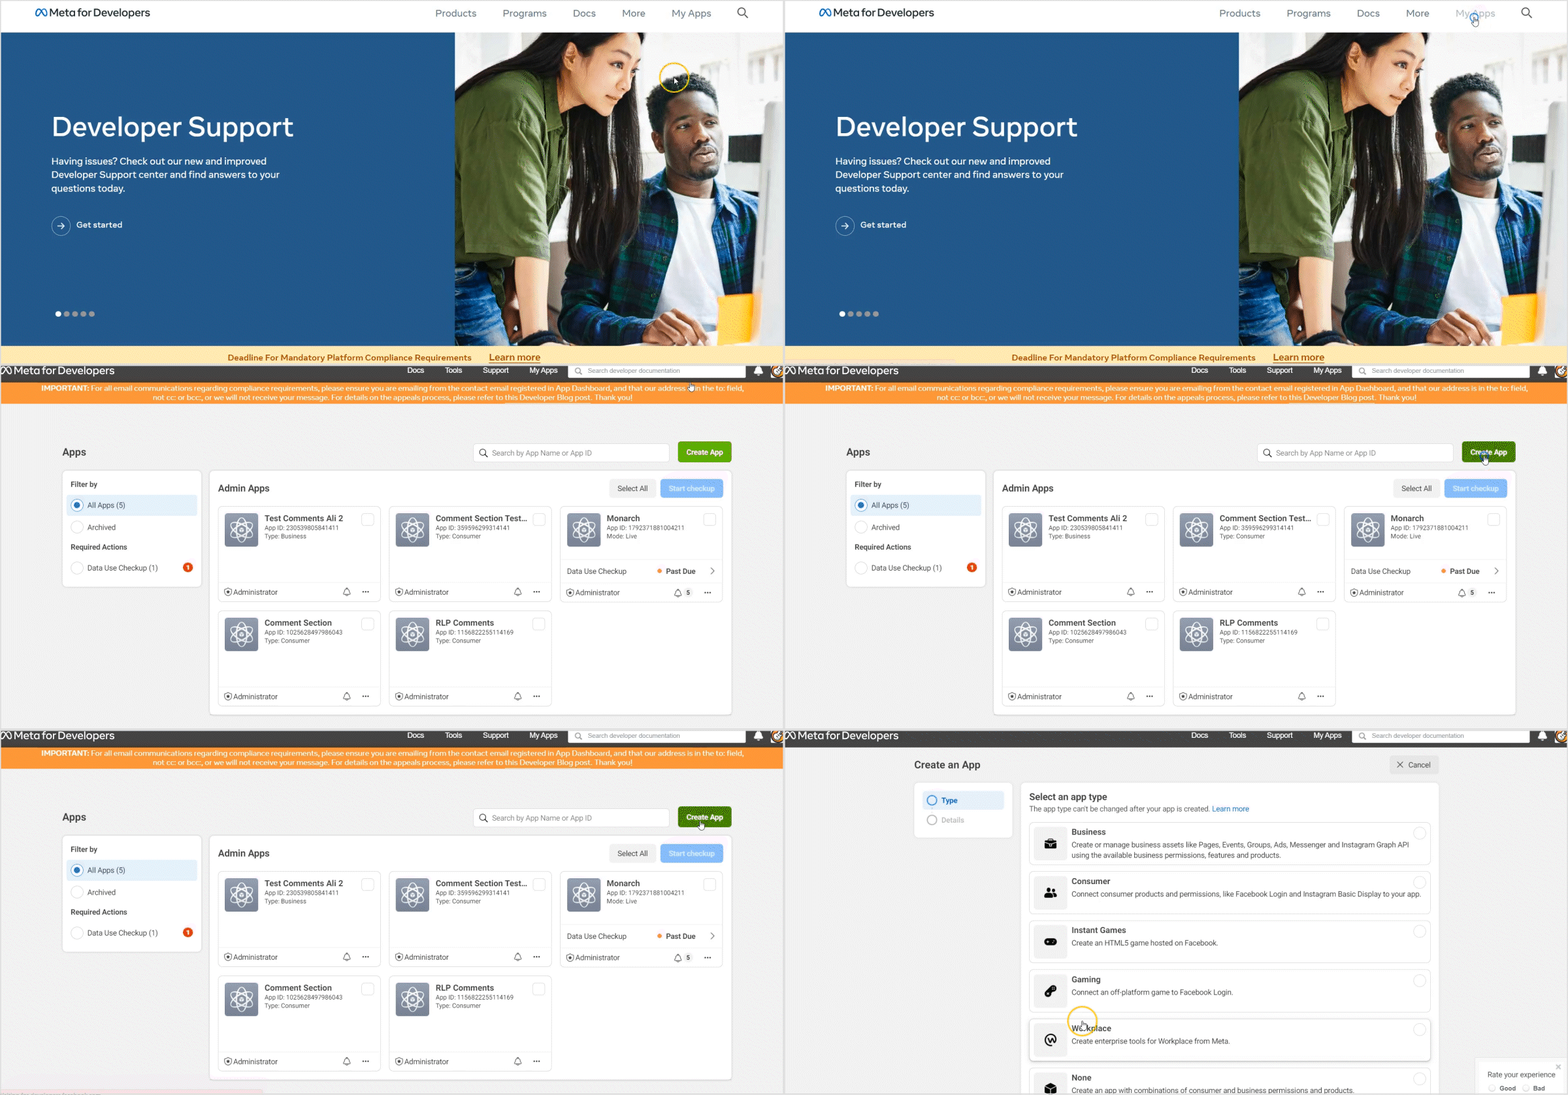
Step 1: Log into Facebook
Navigate to the Facebook for Developers website (https://developers.facebook.com/) and select “Log In”. Then enter your login credentials for the Facebook account you wish to link with the Rockstar Learning Platform.
Note: You can also log in through facebook.com and then navigate to the Facebook for Developers website.
Step 2: Create a New App
Select “My Apps”, and then select “Create App” in the new window.

Step 3: Consumer App Type
Select “Consumer” from the option of app types, and then select “Next”.
Step 4: Fill Out App Details
Fill out the app details and then select “Create App”. Reenter your password or complete the Captcha question if prompted.
- Display Name: Name your app in the textbox field below “Display Name”. This name will show up on your Facebook Apps main page so that you know which app is linked with the Rockstar Learning Platform.
Note: The display name cannot be longer than 32 characters.
- App Contact Email: This email will be used to recover an app if it is deleted. It will also receive emails about potential policy violations, app restrictions, or similarly important communications.
Note: This field will be auto-filled with the email of the Facebook account, but you can change it if you wish for these emails to be sent to a different address.
- Business Account: Leave this field set at “No Business Manager account selected”.
Step 5: Copy App ID from the App Page
Copy the App ID number for the new app.
Note: You can verify if you have the correct App ID by checking the app name in the dropdown box next to the ID.
Step 6: Connect Facebook with the Rockstar Learning Platform
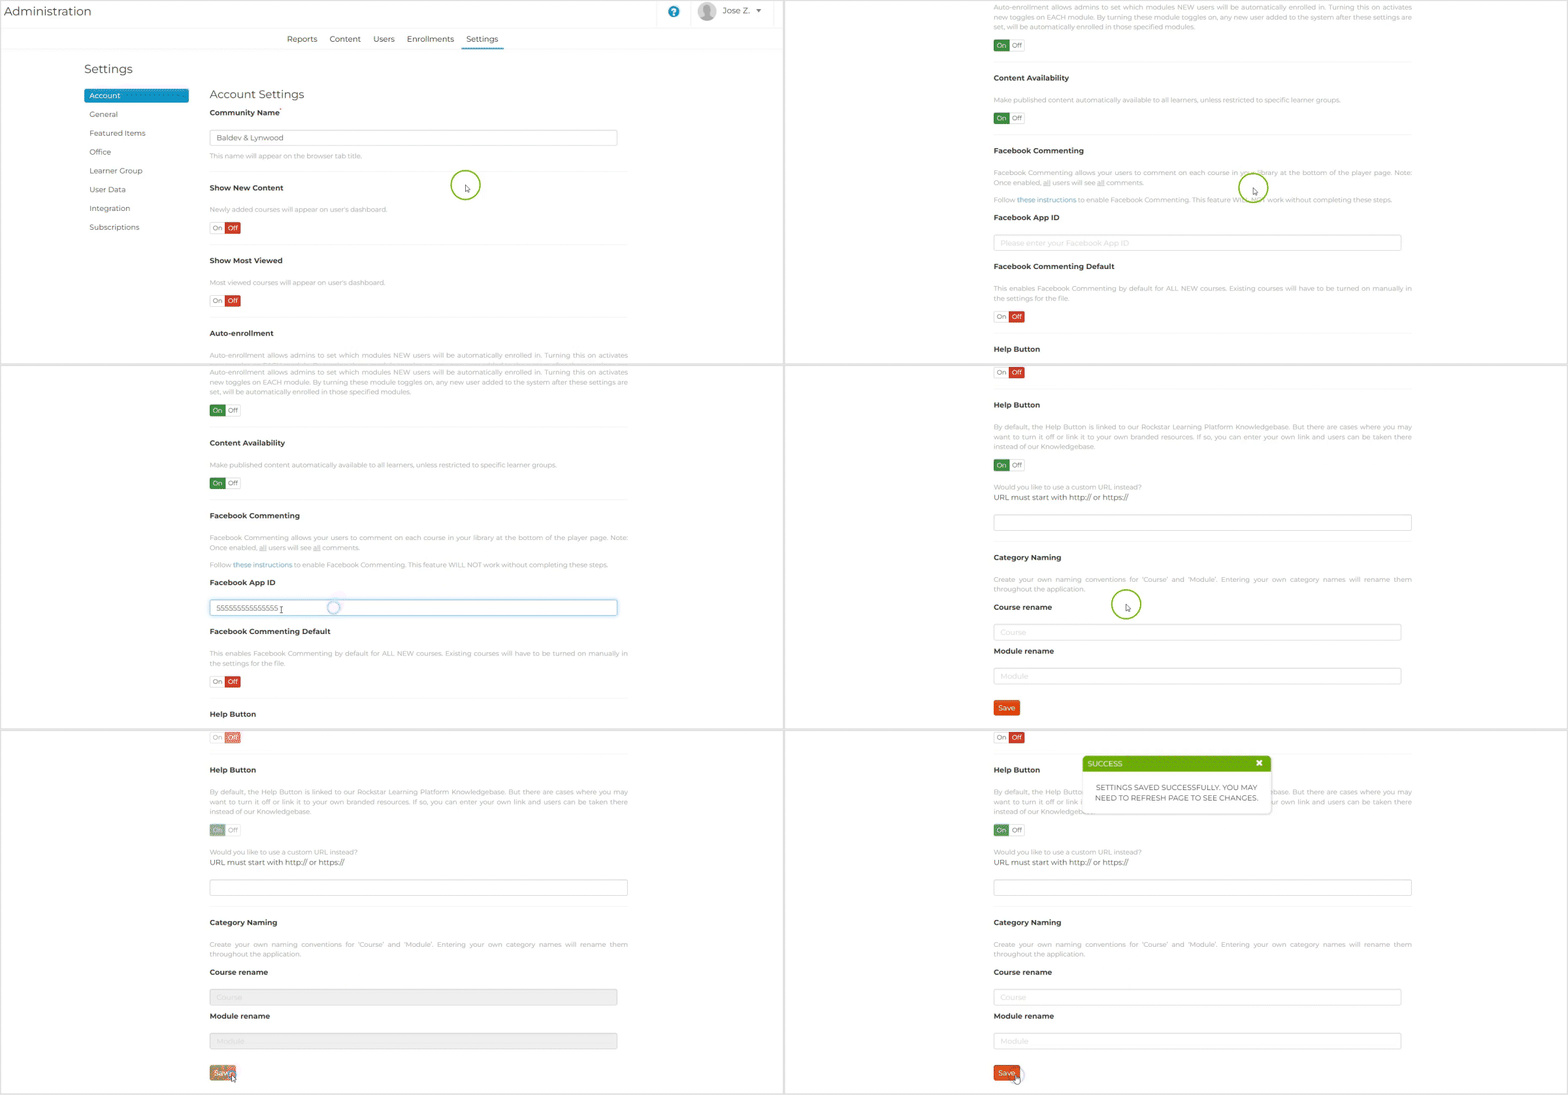
Log in to the Rockstar Learning Platform and navigate to the “Settings” tab of the Admin Portal. Scroll down to the “Facebook Commenting” section of the “Account” tab and paste the App ID in the text field. Then select “Save” to publish your changes.
Caution: This integration relies on third-party cookies to function. If you have a browser security extension that blocks third-party cookies, you will not be able to comment unless you enable third-party cookies for the Rockstar Learning Platform.

Enabling Facebook Commenting
Enable Facebook Commenting for All Modules
If you want a comment section for all new modules by default, navigate to the “Settings” tab of the Admin Portal. Under “Account”, turn “On” the Facebook Commenting Default setting. Select “Save” to keep your changes.
Note: The commenting feature will need to be manually enabled for any existing modules.
Note: Though this setting turns on the comment section for all modules by default, admins can still elect to turn this feature off on a per-module basis.
Enable Facebook Commenting for Individual Modules
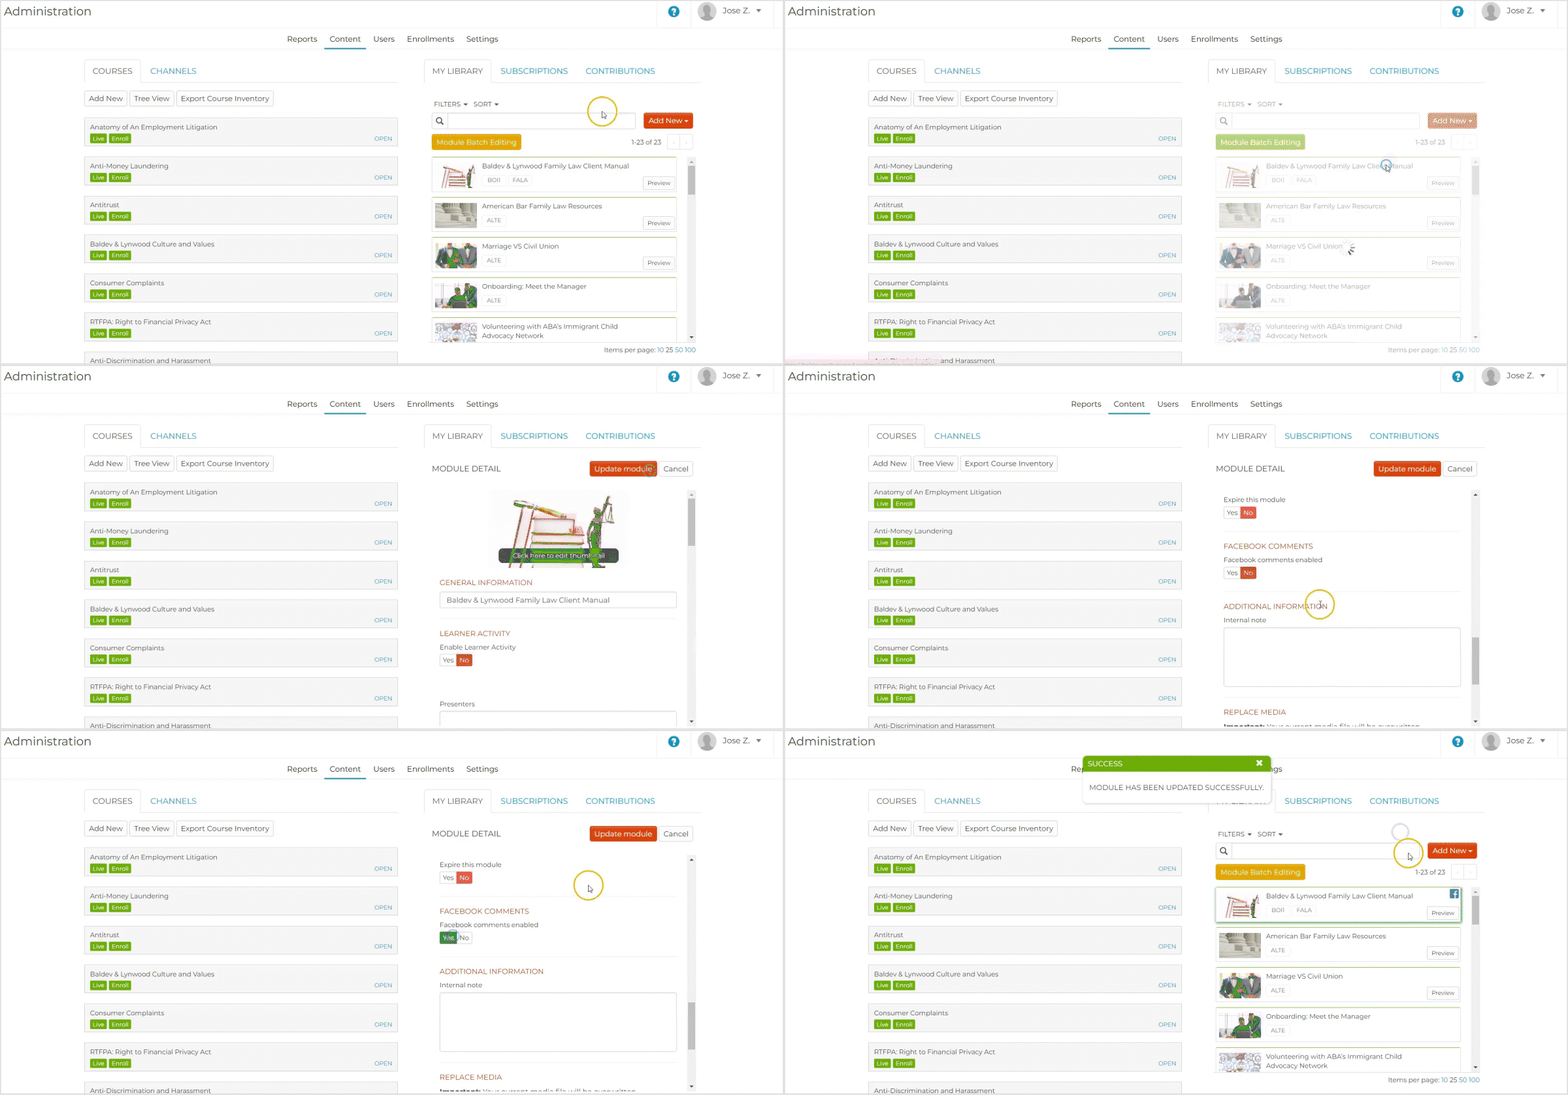
To turn on or off the commenting section for individual modules, navigate to the “Content” tab of the Admin Portal. Select the module you wish to edit then select the “Edit” button. Scroll down to the “Facebook Comments” setting and toggle the switch to “Yes”. Select “Update Module” to save your changes.

