Course Page
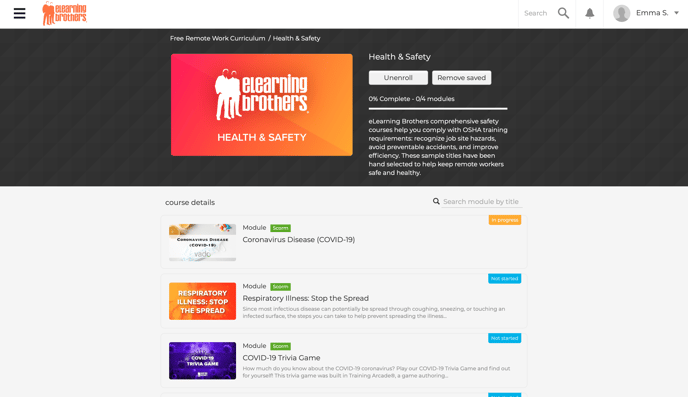
You can access a Course Page by clicking on any course in the platform. The course page will display course details as well as all of the course contents.

To learn how to set up and modify the course elements on this page, view the Creating and Adding Media to Courses article.
Course Thumbnail: You can upload a thumbnail image to your course. The recommended file formats are PNG or JPEG. The recommended thumbnail dimensions are 864 pixels x 486 pixels.
Course Title: The title of the course will display at the top of the course details section.
Enroll: If a course is set as enrollable, users can enroll themselves into courses using the "Enroll" button in the course details section. The course will appear on the user's "Enrolled" tab on the home page.
When a user is enrolled in a course it will allow admins to send users reminder emails to log back in and complete the course, and get more reporting data on their users (See Enrollment Reports). To learn more about enrollments, visit the Enrollments Article.
Add to Saved: If a user wants to be able to easily access a course from the Home Page of the Platform, they can click the "Add to Saved" button. The course will appear in the "Saved" tab on the Home Page.
Enroll Others: Only Admin Users will see the "Enroll Others" button. Clicking this button will bring you to the "Enrollments" tab on the Admin Page. Here you will be able to manually enroll users to the course. To learn more about enrollments visit the Enrollments Article.
Course List: Below the course details section will be a list of all the course contents. This includes sub-courses and modules. Users can click on the course contents to start viewing modules.
This article last reviewed October, 2021. The software may have changed since the last review.
