Creating and Editing a Microlearning Module
If you'd like to watch a Demo, click here.
Nov 3, 2023
CREATING A MICROLEARNING MODULE
To add a Microlearning Module to your platform click on the "Add new" button. Choose the "Microlearning Module" button from the "Add New" drop down.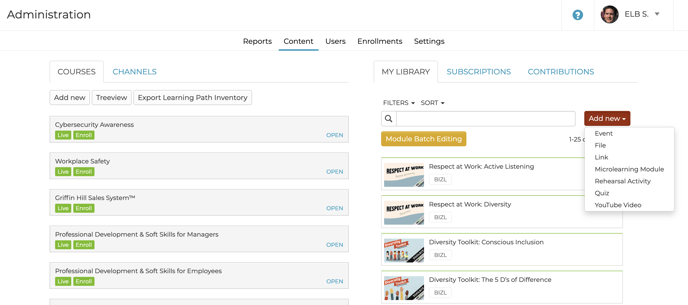
Click the "Build Microlearning Module" to create your module.
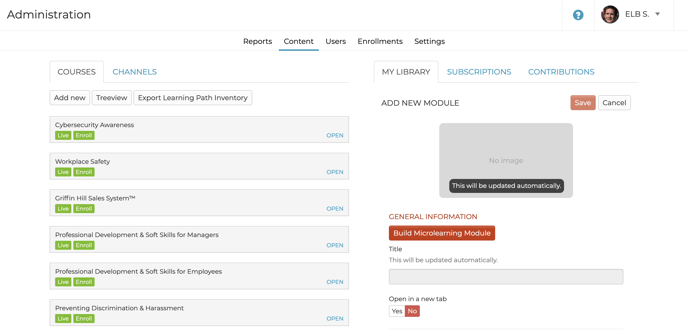
The Microlearning Module editor will open with the following sample blocks: page title, page description, section header, body text, and an image.
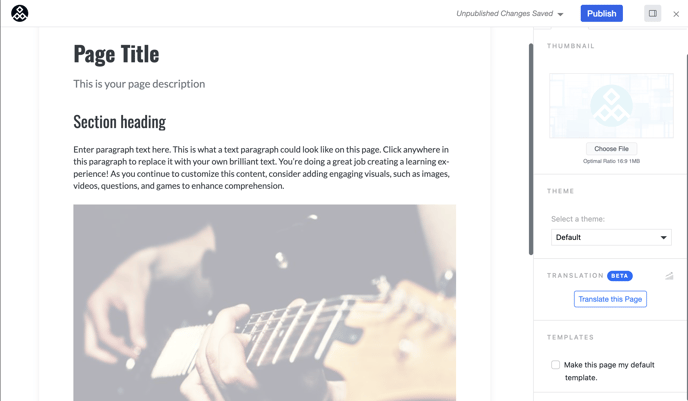
The new Microlearning Modules will open with a default template. Each Microlearning Module is required to have a Page Title. The rest of the module is customizable by selecting one or more of the available block types.
Page Title: (required)
Update the Page Title and description block by clicking on and then typing in those fields.
Content:
Click the text, image, video, CenarioVR, or Game icons to add content to your module.
- Text: You can use this to add text to your Microlearning Module.
- Image: Add an image by uploading a file, directly from the device camera, or by using the Library option. The Library option is connected directly to our Asset Library; making it easy to find the perfect image for your Microlearning Module.
- Video: Add a video by uploading a file, directly from the device camera, or add a YouTube video. Closed captioning will be automatically available to the learner.
- Game: Add an interactive game from The Training Arcade™.
- Arcade: Add your Arcade learning experience platform from The Training Arcade™.
Add content such as Jeopardy, scenarios, and much more from your The Training Arcade account! To learn more, contact your account executive or email sales@elblearning.com - Question: Choose from 3 different question types. Multiple choice, Multiple select, and Short answer. Tip: Once a learner has selected an answer, a Submit button will be displayed. Once submitted, the learner will receive instant feedback.
- VR: Add your own Virtual Reality content from CenarioVR by entering your CenarioVR URL into the text-field. To learn more about CenarioVR, click the "Subscribe" button. You can also contact your account executive or email sales@elblearning.com
You can add as many text, image, video, game, arcade, or question blocks to your content as you would like by clicking on the "+" icon between blocks or choosing a block type at the bottom of the page.
If you would like to edit, delete, or move a section, click to select the block to enable these options. Click and drag the move icon to rearrange the sections. Click the trashcan icon to delete a section. To edit a text block, click the existing text with your cursor.


Theme Drop Down:
You can choose your theme by clicking on the drop-down in the property panel. This will change the colors, background, and fonts of your module.
Template:
If you would like to use the Microlearning Module currently being edit as a starting point for future pages, mark the check box to 'Start with this page as template'.
Publishing:
When you are done creating or editing your module, click on the "Publish" button in the upper right-hand corner. This will publish your module and return to the Module Detail page.
Tip: All edits are automatically saved, but will not be live until Published.
After Publishing:
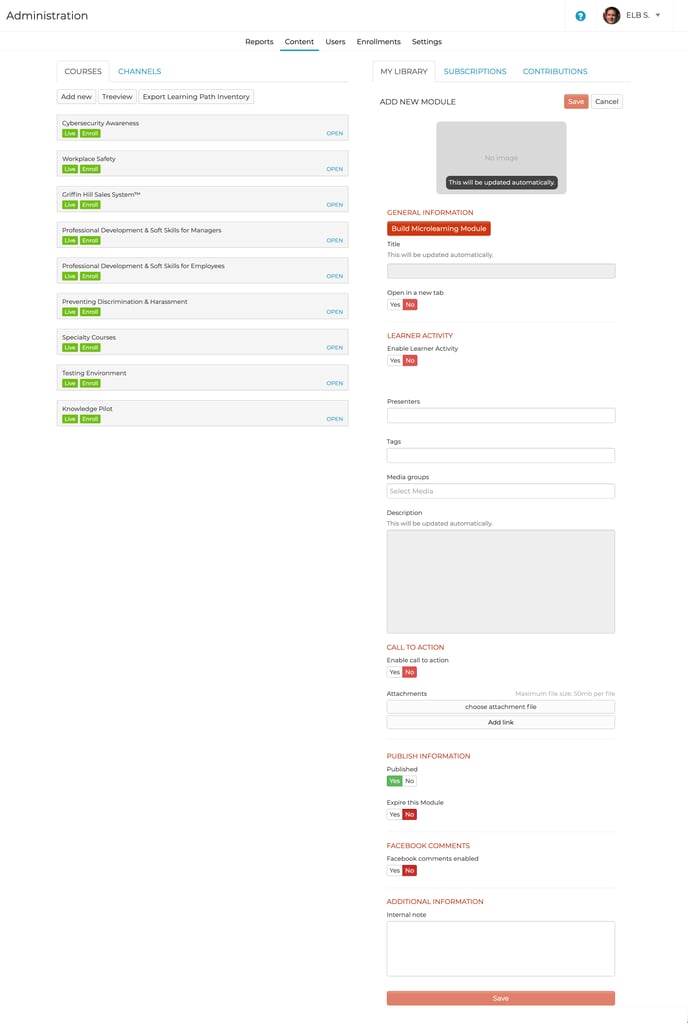 Title: The title will be filled out based on what you enter in the microlearning module builder.
Description: The module description will be filled out based on what you enter in the microlearning module builder.
Translations
Formerly a premium paid feature, the translation feature in a Microlearning Module now comes in a limited free version that's available to everyone. Making your content more inclusive and accessible to a global audience. With this feature, you can:
- Automatically translate text and videos into multiple languages
- Enjoy AI-generated voice-over tracks for videos
- Translate up to 1 million characters with this limited free version
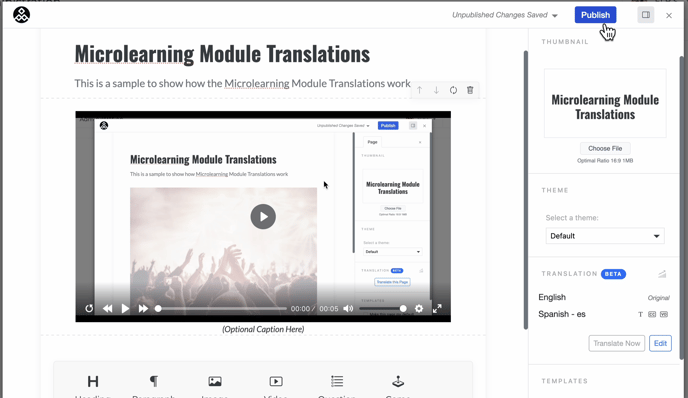
How-To Setup:
Step 1: Click on the "Translate This Page" button
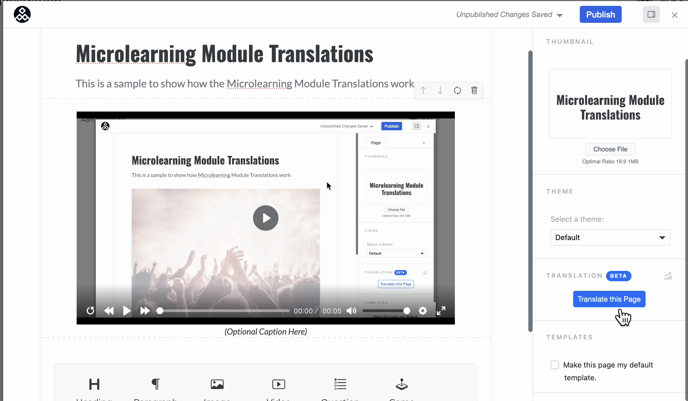
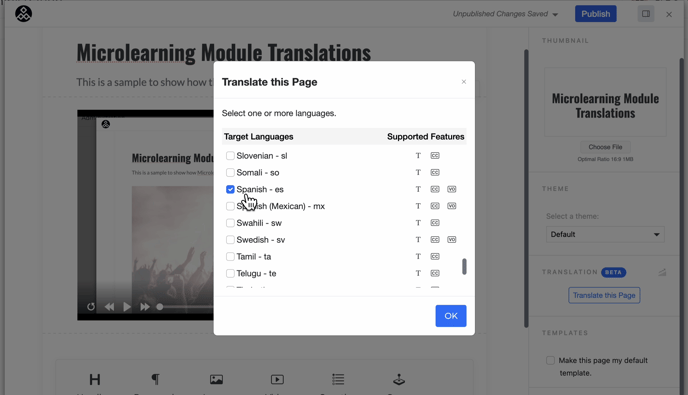
Step 2: Select the language you'd like to use
Note: The "Supported Features" column will show "T" for Translating the text on the page; "CC" for Closed Caption Translation on a Video with Audio; and "VO" for Voice Over Translation on a Video with Audio
Caution: Not all languages are supported for Text, CC, and VO
 Step 3: Once a language is selected, it will show "Waiting for Publish." This indicates that it needs to be Translated. In order to do so, click the "Translate Now" button
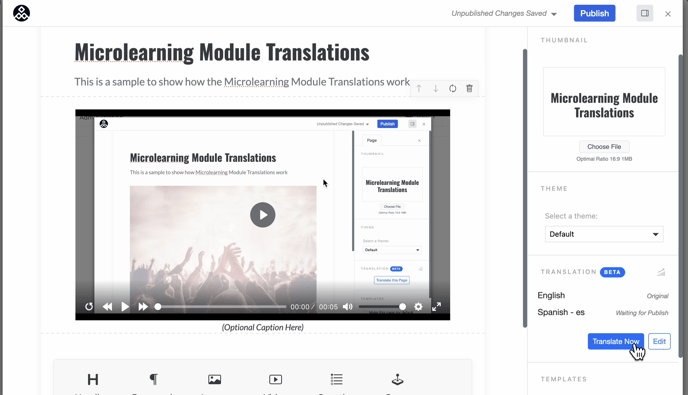
Step 4: Once the Translation has processed, you should see the Supported Features display. In this example, you can see the "T," "CC," and "VO" for Spanish. Now, you can click "Publish"
How-To Use:
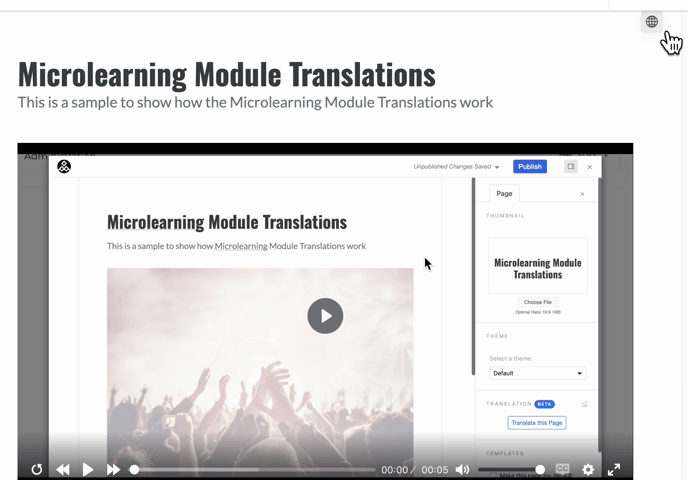
Step 1: Click on the "Globe" icon to select a language you'd like the text translated to
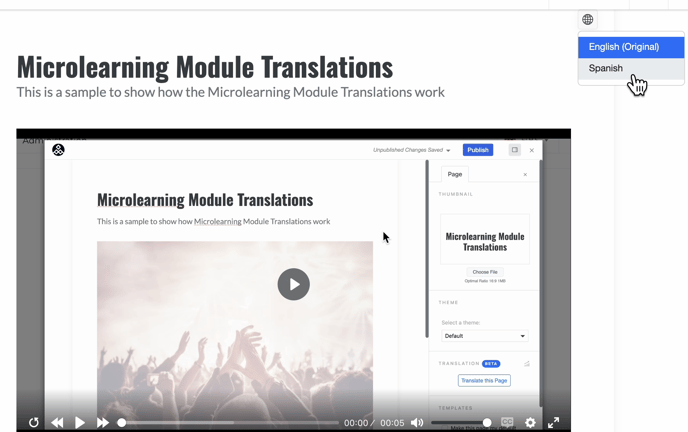
 Step 2: Select a language you'd like the text translated to
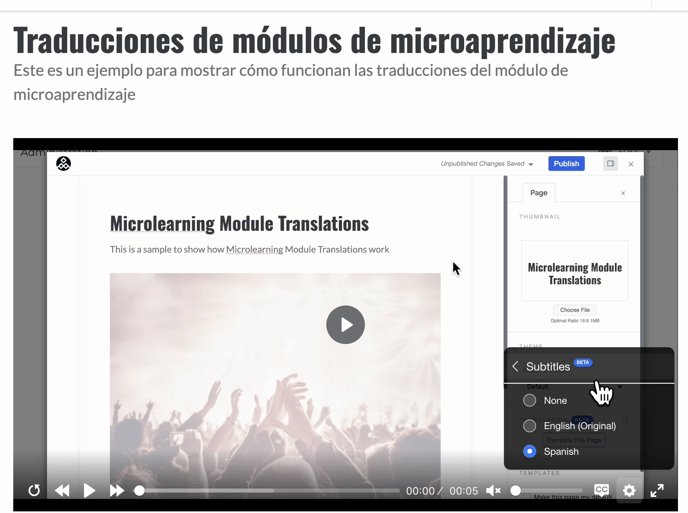
 Step 3: For Video Translations, click on the "Gear" icon to view options
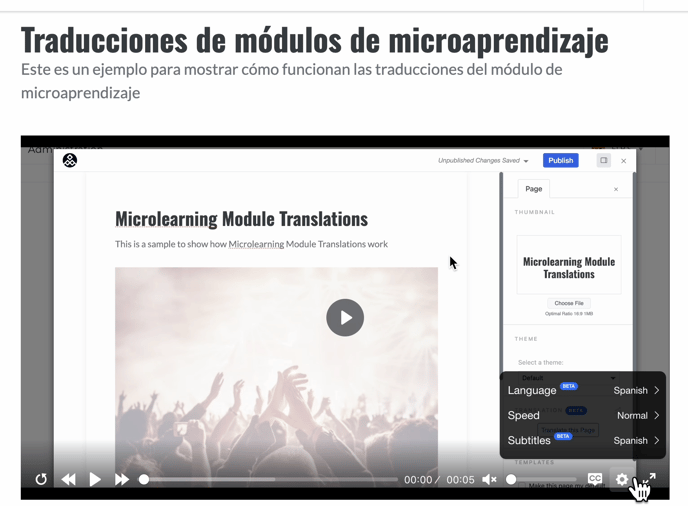 Step 4: For Video-Audio Translations (Voice Over), click on the "Language" option to select a language you'd like the Video-Audio Translated to
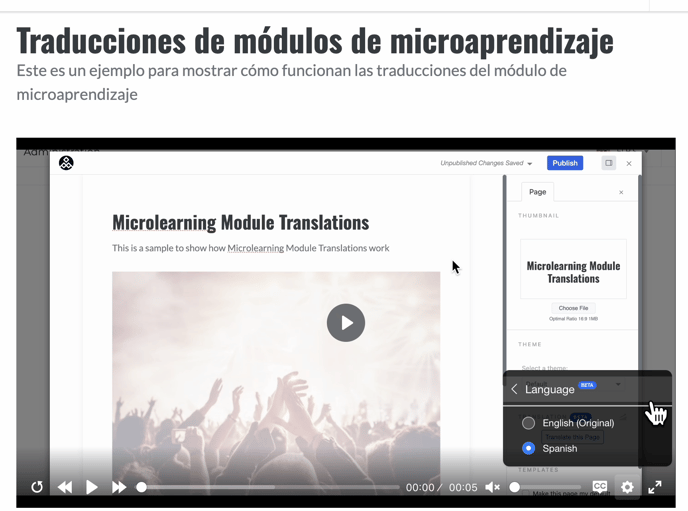 Step 5: For Video-Subtitle Translations (Closed Caption), click on the "Subtitle" option to select a language you'd like the Video-Subtitles Translated to
Questions

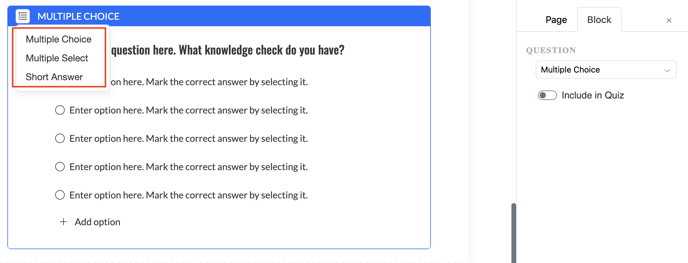
The updated Question block allows you to add Multiple Choice, Multiple Select, and Short Answer questions.
Multiple Choice: This allows you to create a question that requires a user to select 1 correct answer
Multiple Select: This allows you to create a question that requires a user to select multiple correct answers
Short Answer: This allows you to create a prompt/question that requires a user to write a short answer
Note: For cases in which a Short Answer question has an exact answer, such as "What company does the Rockstar Learning Platform belong to," you can setup the correct answer that a user must enter; and even make it case sensitive (so the answer must have proper capitalization).
The acceptable answers for this question might be "ELB Learning," "elblearning," or "ELB." If a user entered one of those variations, they would answer correctly.
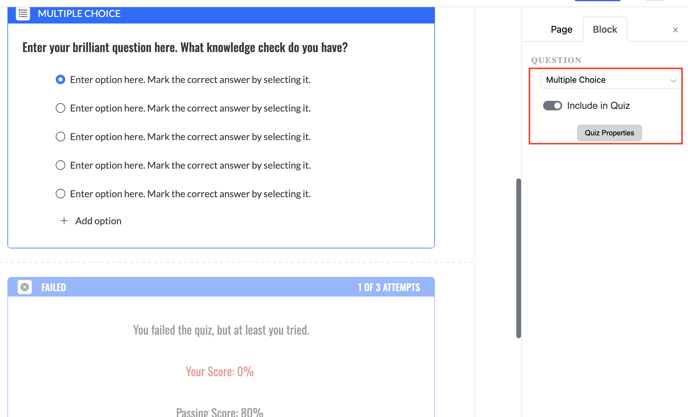
Include in Quiz
Toggling this feature on, "Include in Quiz," will allow your Questions to be scored. Once you've toggled that on, you'll see an additional selection become available, "Quiz Properties."
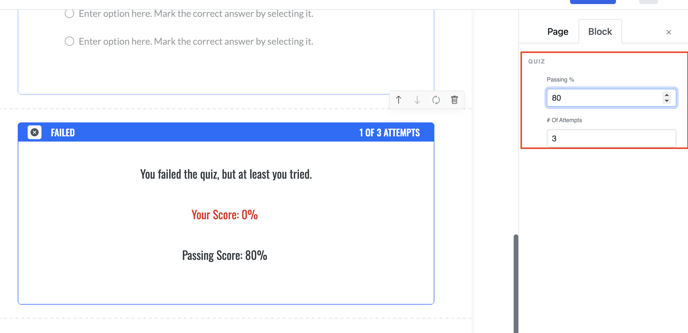
Quiz Properties
This allows you to set the Passing Score (%), and the Total Number (#) of Attempts.
To Learn about the other module details, visit the "Understanding the Module Details" Article.

