November 22, 2022
To edit a user, click on the "Edit" button next to the user you need to make changes to.

This button will pull up a light box with user fields that you can edit.
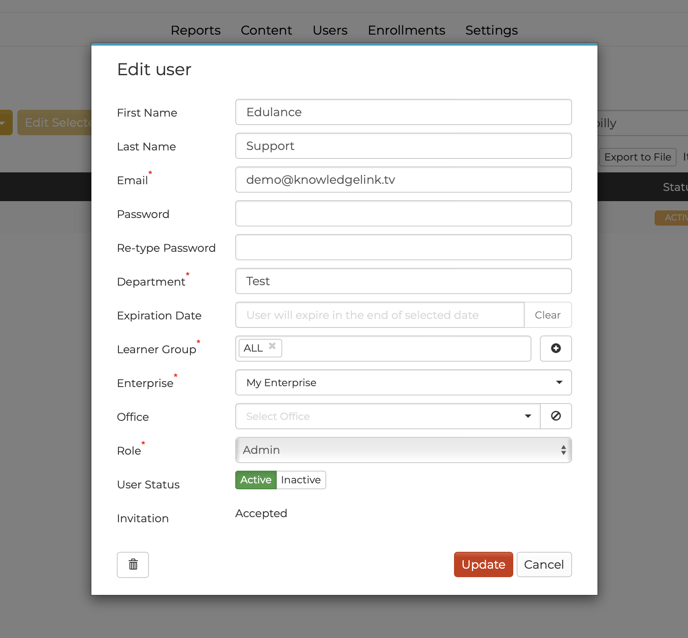
Here you can:
- Change the user's first name, last name, and email address.
- Reset the user's password
- Enter the user’s department if applicable.
- Expire the user using the calendar drop down to choose an expiration date, change.
- Change the user's learner group (see the Learner Group Settings article).
- Change the user's enterprise if applicable (see the Enterprise IDs article).
- Change the user's office if applicable.
- Change the user's role. There are 4 roles a user can be assigned to:
- Member: This user role only has access to the User Portal. This user does not have admin access.
- Admin: This user has super admin access. Only assign a user this role if they need to edit settings and content.
- Office Admin - Read the Office Settings article to learn more about this role.
- Enterprise Admin - Read the Enterprise IDs article to learn more about this role.
- Update the user's status if you need to make the user active or inactive.
- Click the red "Update" button to update the user on the platform.
- Delete the user from the platform using the trash can icon.
Note: If a user is inactive they will not be able to login to the platform.
Note: We recommend making the user inactive instead of deleting the user. The user's data will still be available in the reporting tab even after they have been deleted.
Click the red "Update" button to update the user in the platform.
This article last reviewed November, 2022. The software may have changed since the last review.