How to Set Due Dates and Due Date Notifications for Courses and Modules
Setting enrollment due dates for courses and modules. Set “due soon” and “past due” dates for modules and courses. Quickly view enrollment due dates.
Dec 1, 2023
Admins can use due dates to remind users when they need to complete a course or module. While users will still be able to access a past-due course, admins can set up automated notifications based on a course’s due date. They can also see which courses were completed after the due date from the Report tab.
Note: Due dates can be set per user per course or module, meaning users enrolled in the same course/module can have different due dates.
Setting Enrollment Due Dates
Step 1: Opening Enrollment Menu
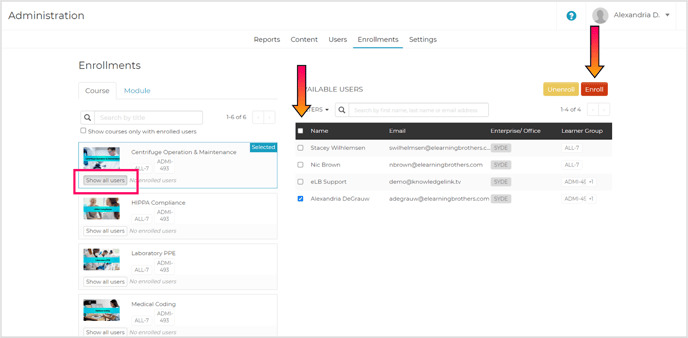
Navigate to the Enrollment tab of the Admin portal. Select “show all users” on a course or module and select your desired users. Then select the “Enroll” button.
Note: The search can be used to find specific users by their first name, last name, or email address.
Step 2: Add a Due Date
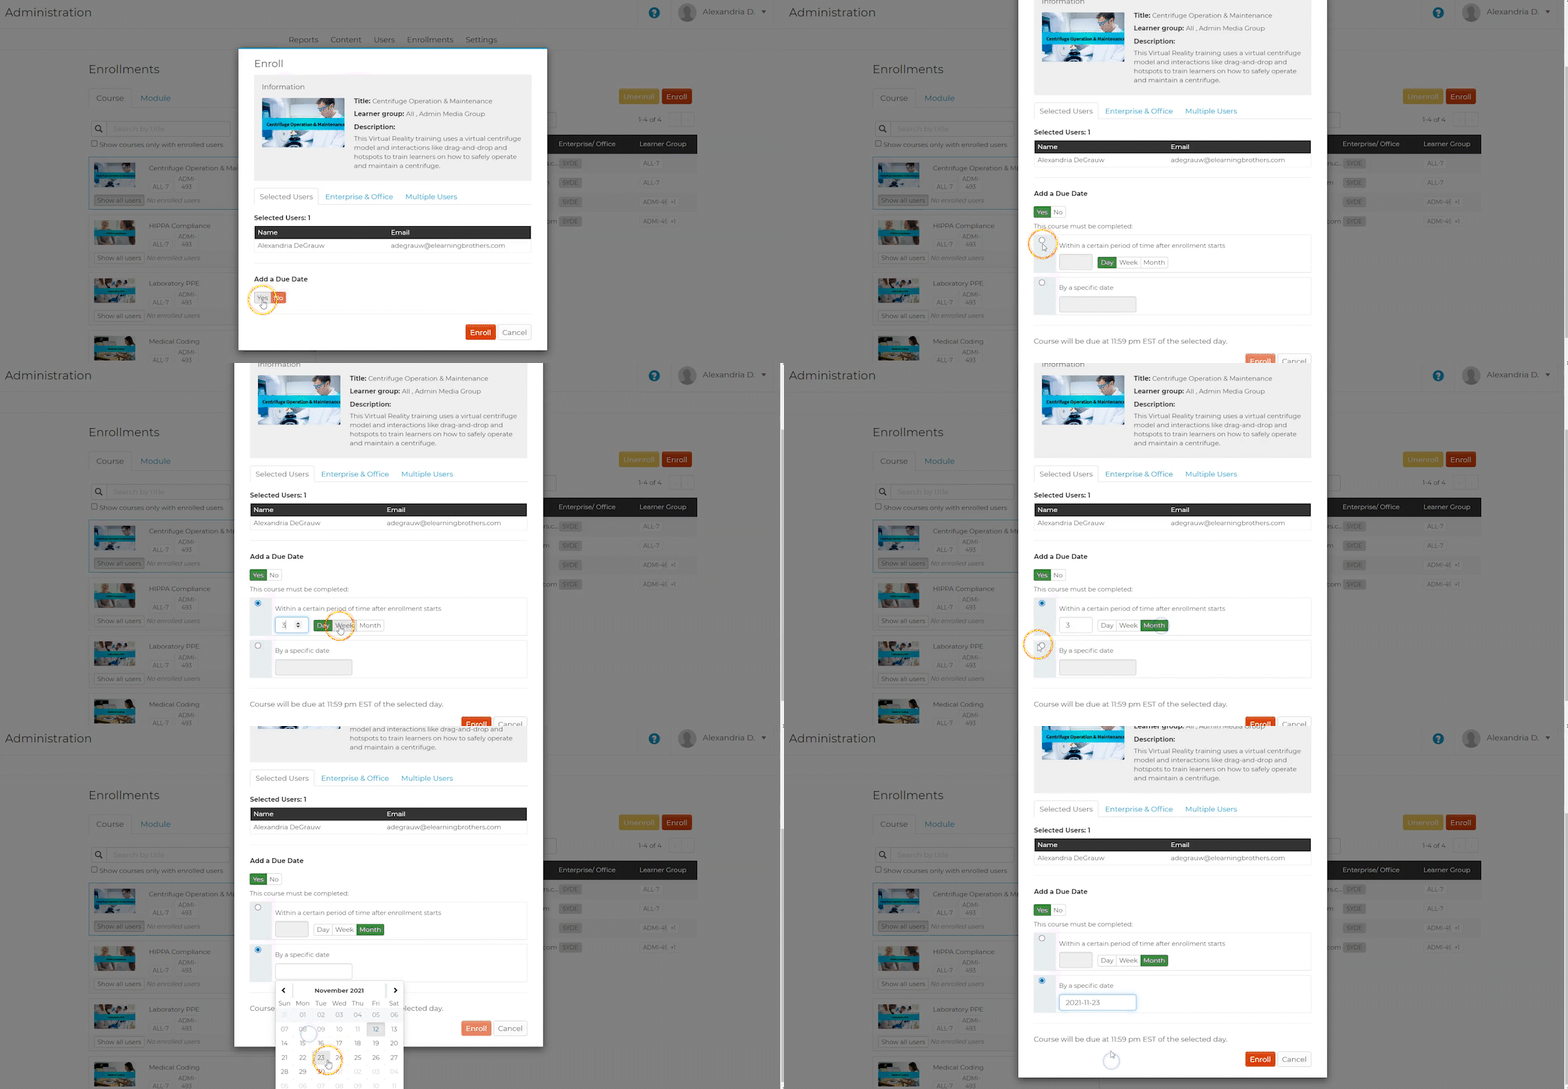
Toggle “Yes” under “Add a Due Date” to add either a specific or relative due date. Relative due dates are based on the number of days, weeks, or months after the user(s) have been enrolled. To set a specific due date, select the date from the calendar.
Note: If it is a recurring enrollment, the admin will only be able to set a relative due date. When a relative due date is set for a recurring enrollment, the relative due date will be automatically set each time the enrollment recurs.
Step 3: Set Due Date
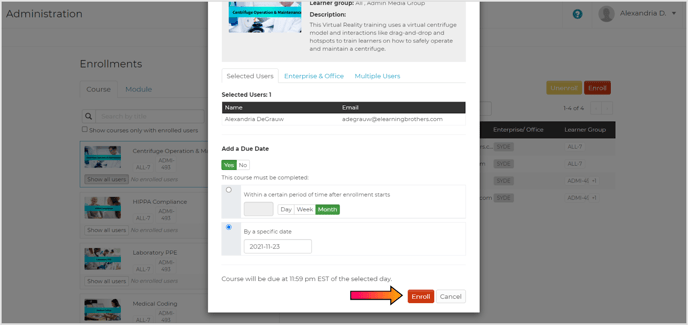
Select “Enroll” to enroll the user(s) in the course or module with a corresponding due date. Users will remain enrolled in a course or module even after the due date passes.
Note: The course will be due at 11:59 pm EST.
Setting Up Due Date Reminders
Step 1: Due Date Reminder Settings
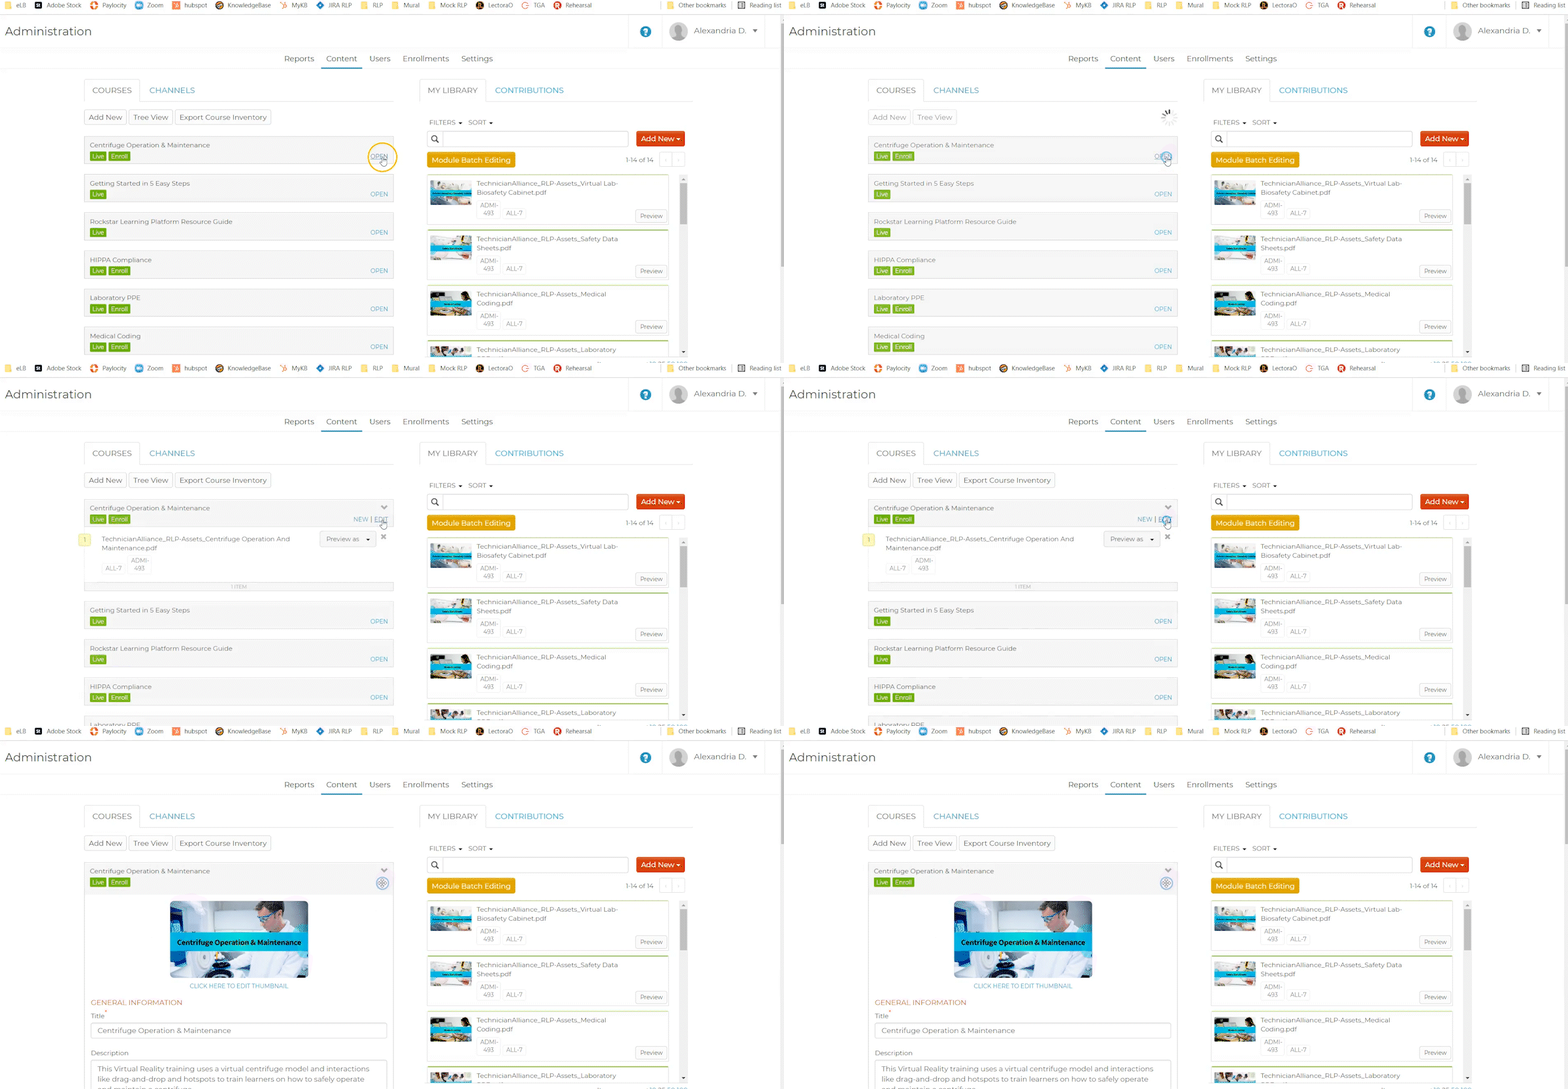
To add “due soon” and “past due” notifications, navigate to the “Content” tab on the admin portal. Select “Open” for an enrollable course and then select the “edit” button.
Note: By default, users will receive both in-app and email reminders; however, administrators can turn off email reminders so users only receive them in-app. Users will still receive an initial email notification for initially being enrolled in the course or module.
Caution: If the toggle in the course settings under “Allow Users to Enroll” is set at “No”, the rest of the enrollment settings like the due date reminders will not be visible. Toggle this setting to “Yes” to make the course enrollable.
Step 2: Enable Reminders
Caution: Must be enabled in order to add “due soon” and “past due” reminders. If the reminder setting is set to “Do not send email”, “due soon” and “past due” reminders cannot be set.

Step 3: Setting Due Soon Notifications
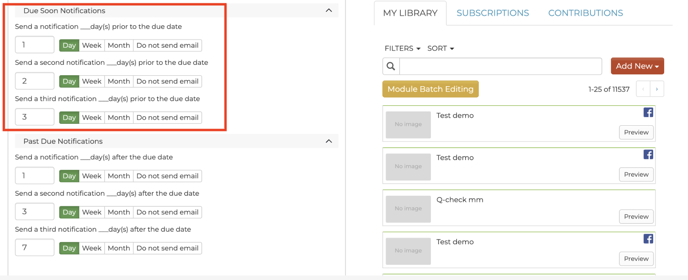
Select “Due Soon Notifications” from the course editor. Fill in how many days, weeks, or months before the due date to send the notification. Admin can set up to three “due soon” notifications.
Step 4: Setting Past Due Notifications
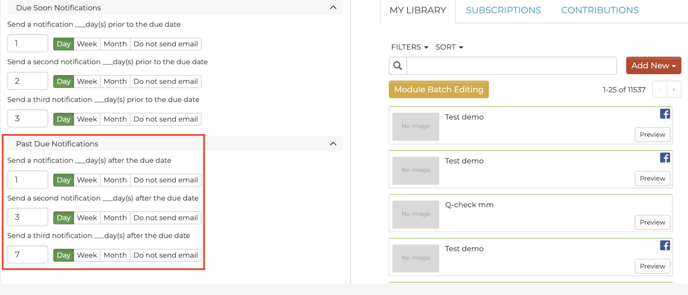
Select “Past Due Notifications” from the course editor. Fill in how many days, weeks, or months after the due date to send the notification. Admin can set up to three “past due” notifications.
View Enrollment Due Dates
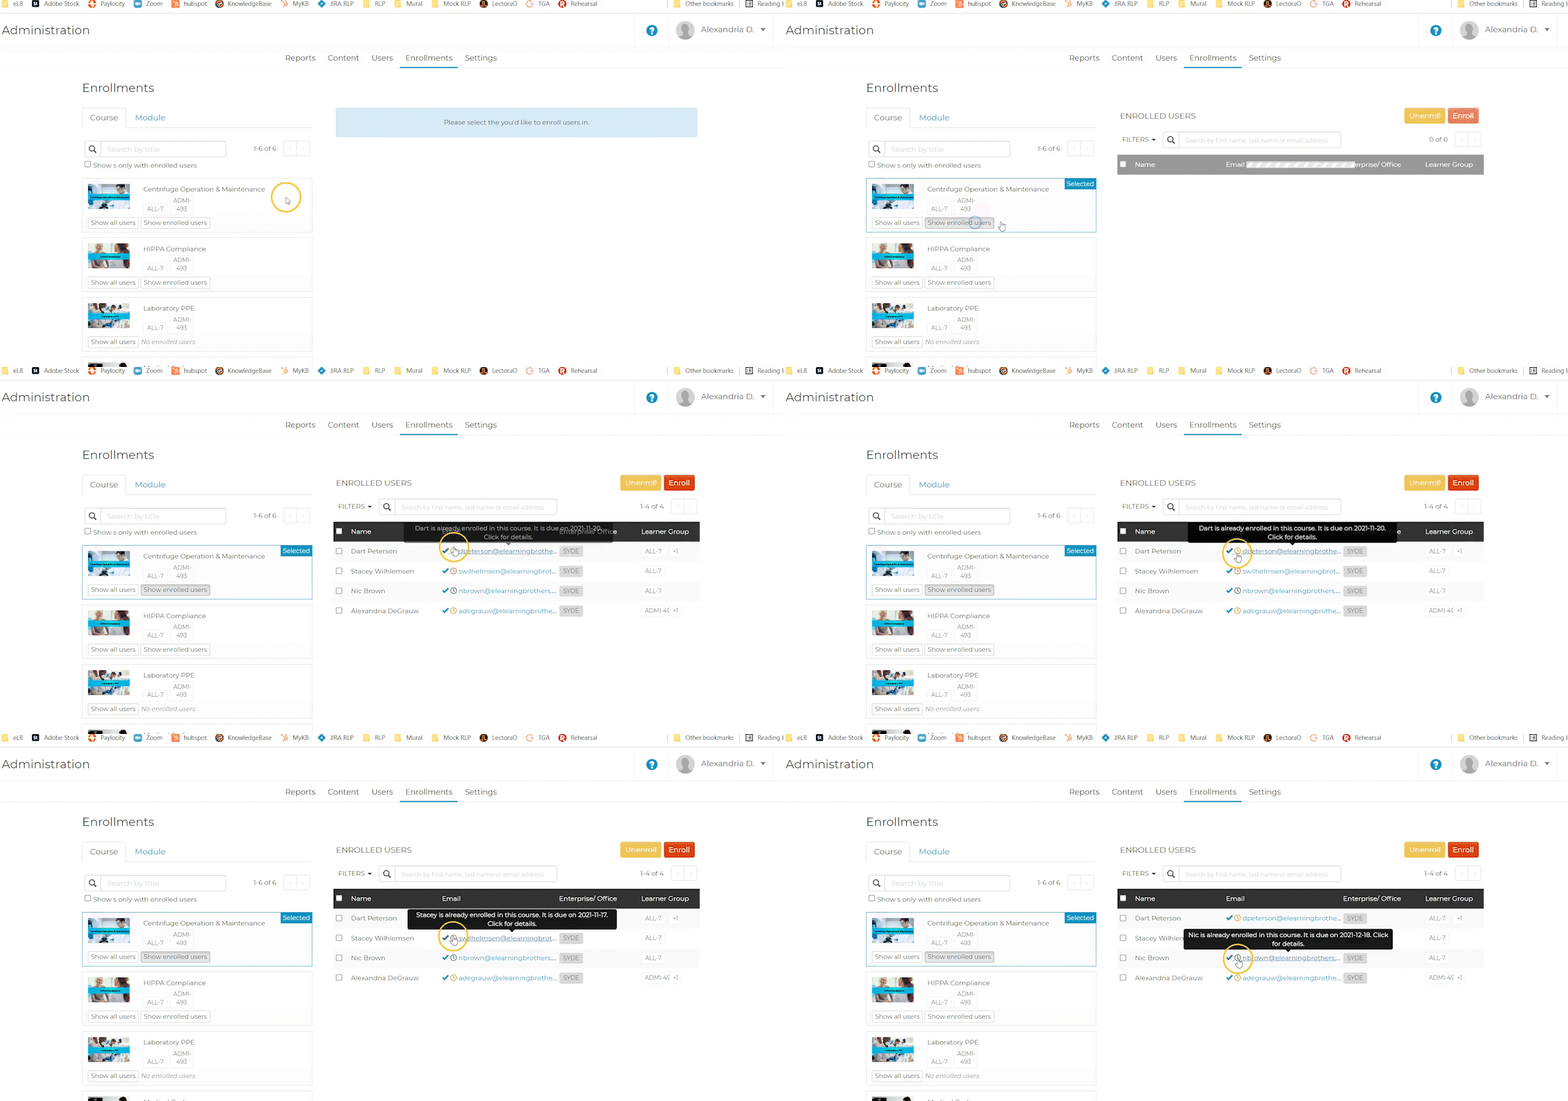
Admins can see which users have due dates set for a course in the Enrollments tab of the Admin portal. Select “Show enrolled users” on your desired course. Users with a due date will have a clock icon next to their names. Hover over the clock icon to see the due date. The icon will change colors according to how close the due date is.
- Green - There is at least 1 week until the course is due.
- Yellow - The course is due within a week
- Red - The course is past due
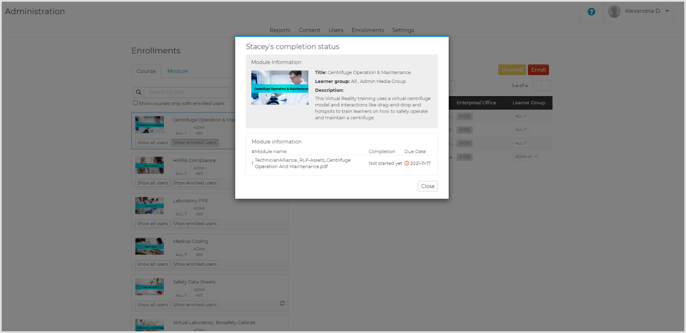
Selecting the user’s email address will also display the module name, completion status, and due date for the course.
Related: For more information on enrollment due date reports, visit How to Generate an Enrollment Completion Report with Due Dates.
