Admin Manually Enroll Users in Courses
Teaches Administrators how to manually enroll users, either at the individual level or bulk enrollment. Shows where to view enrolled users. Set due dates.
January 10, 2022
When an administrator enrolls a user in a course, the course will appear on the user’s “Enrolled” tab. By enrolling a user in a course, administrators can view user data reports (See Enrollment Reports), set up automatic reminder emails (How to Set Enrollment Due Dates and Due Date Notifications for Courses and Modules), and organize content in a way that is easy to understand.
Related: To learn how to automatically enroll users, visit the Account Settings article. To learn more about automatic recurring enrollments, visit Setting Auto-Recurring Enrollments. To learn more about how users unenroll themselves, visit the Course Page article.
Manual Enrollments
Step 1: Choose The Course
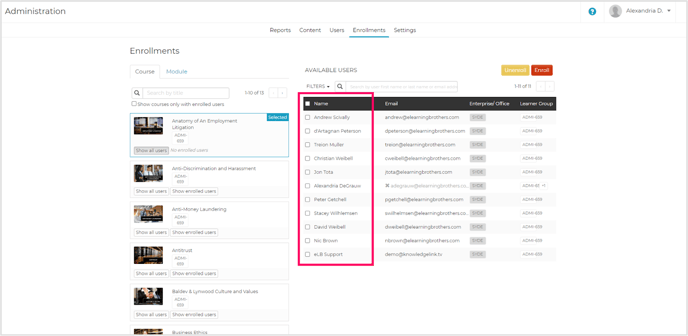
Navigate to the “Enrollments” tab of the Admin portal. Find the course in the left-hand column of the page or search for the course by typing the course title in the search field. Select "Show all users" to display everyone who has access to this course.
Note: A course has to be set as "enrollable" to be listed in this column. Visit How to Create, Edit, or Delete a Course to learn how to make courses enrollable.
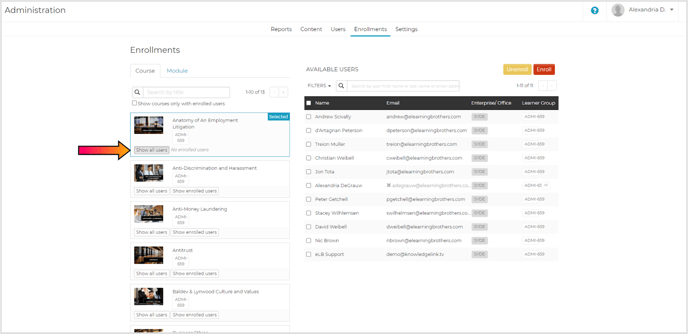
Note: A user must share at least one Learner Group with the course to be enrolled in the course. By default, all new users and courses are assigned the “All” learner group (See Make Content Available to All Users with the “All” Learner Group), but these groups can be customized to restrict access to only a few users (see Learner Group Settings).
Step 2: Choose the User(s)
Choose the users you want to enroll in the course by checking off the box next to their name.
Note: You can select all users by checking the box next to the "Name" title. You can also sort and filter users by enterprise, office, and learner group using the filters drop-down next to the search bar.
Step 3: Set Due Date (Optional)
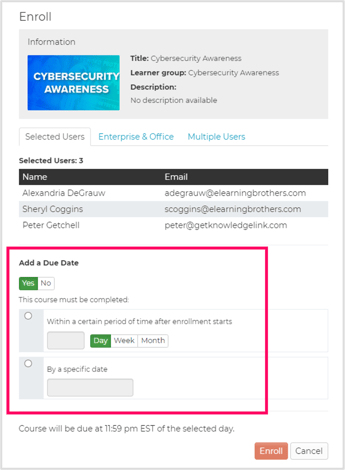
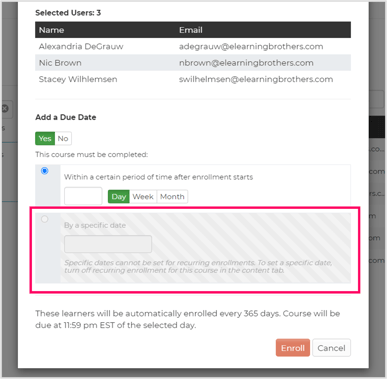
To set a due date for all selected users, select “Yes” under the “Add a Due Date” section. You can set either a specific date or a date relative to when the enrollment starts.
Note: Courses will be due at 11:59pm on the selected date based on the timezone of the user’s” computer.
If the course is set to have auto-recurring enrollments, the “specific date” option will be grayed out. Specific dates cannot be set for courses with auto-recurring enrollments.
Step 4: Enroll Users
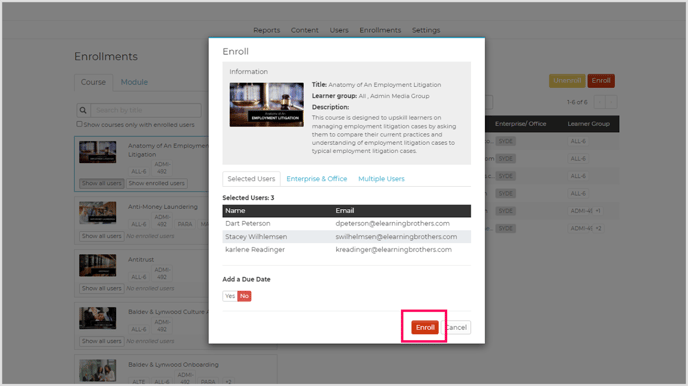
Select the red "Enroll" button to enroll all of your selected users in the course. Then select the “Enroll” button from the Enroll page popup.
Note: An email will go out to your newly enrolled users alerting them that they have been enrolled in the course.
Bulk Enrollment
Step 1: Open Enrollment Window
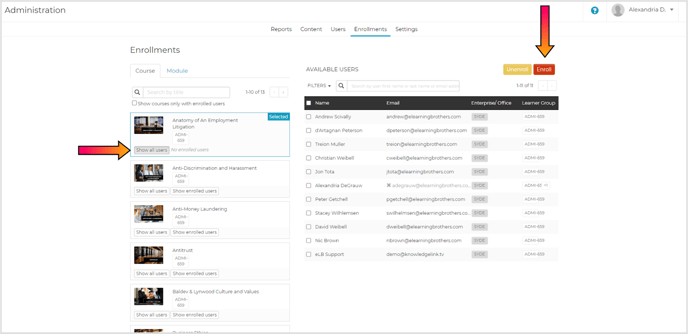
Navigate to the “Enrollments” tab of the Admin portal and select the desired course. Select “Show All Users” to display the list of users who have access to the course, and then select the red "Enroll" button.
Step 2A: Enroll Enterprise & Office
Choose the Enterprise and Office tab. Select an Enterprise or Office from the dropdown and then select the “Enroll” button.
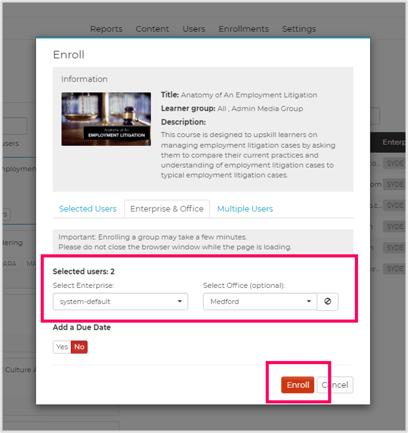
Step 2B: Enroll Multiple Users
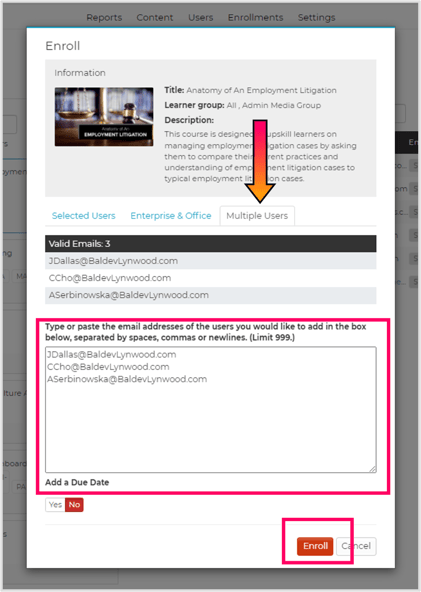
Choose the "Multiple Users" tab. Add the emails of the users you wish to enroll, separating them by a comma, space, or a new line. Add a due date if you want one, and then select the "Enroll" button.
Note: Admins can enroll up to 999 users at a time.
Viewing Enrolled Users
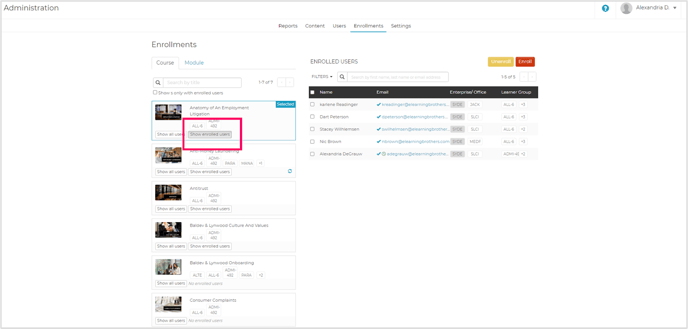
After you enroll users into a course, you will see a new button appear next to the course on the left-hand side. The "Show enrolled users" button will allow admins to view enrolled users in the course.
Note: This will show all enrolled users regardless of how they were enrolled (e.g. auto-enrollment, manual admin enrollment, and users enrolling themselves).

