Note from the Product Manager
At Rehearsal, our commitment is to iteratively enhance your experience by introducing new features that align with evolving technologies. As a result, the guide you are about to read may differ in appearance or functionality from the current version of Rehearsal. We appreciate your patience as we work diligently to update our product documentation.
If you are running into specific issues, feel free to reach out to support@elblearning.com
Written Guide: Step by Step
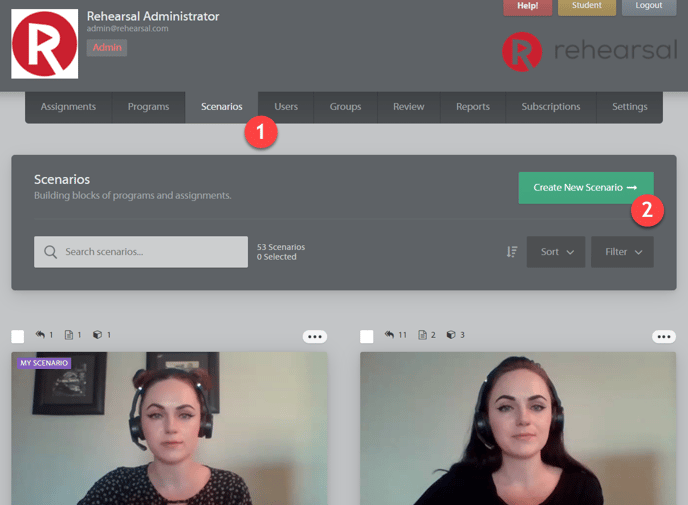
Step 1: Scenario Tab
Begin by clicking on the Scenario tab.
Step 2: Create Scenario
Click on Create New Scenario.
Step 3: Scenario Title
Title the Scenario by double-clicking in the text area. Save your changes by hitting 'Enter' on your keyboard.
Step 4: Record or Upload
Choose to either Record or Upload a Scenario into the Scenario editor. 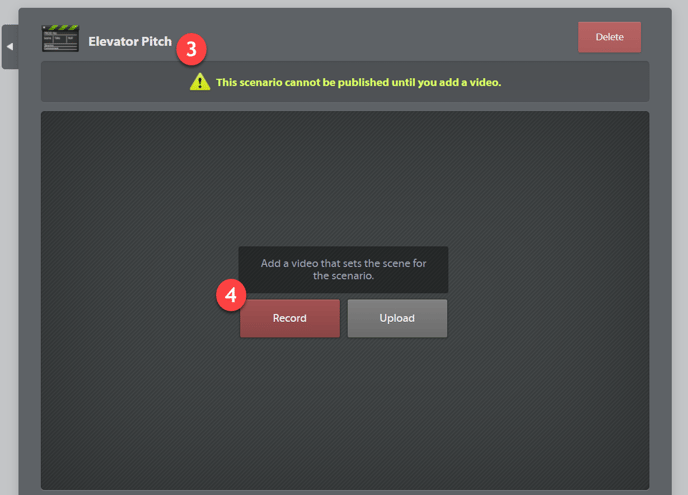
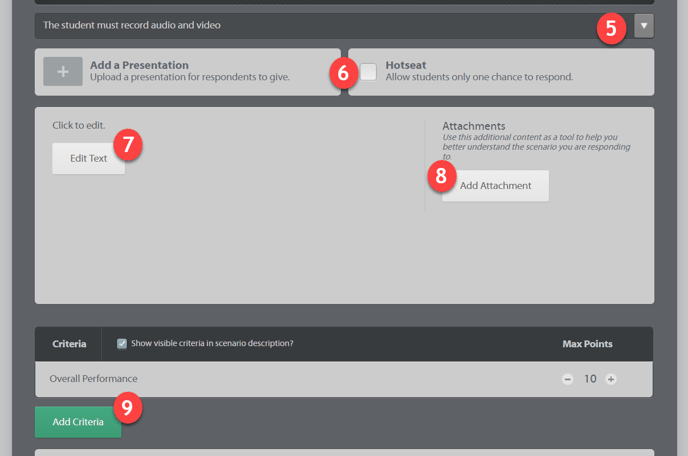
Step 5: Scenario Type
Select the type of Scenario you would like it to be by using the drop-down menu. It always defaults to the most common Scenario type, which is Audio and Video Scenario.
Step 6: Additional Options - Presentation or Hotseat Scenario
To make it a Presentation Scenario, or Hotseat Scenario use the options below the Scenario type drop-down menu.
Step 7: Text Description
Add text instructions, if you wish.
Step 8: Attachments
Add attachments, if you wish. Most common document types are accepted.
Step 9: Criteria
Create the Criteria by clicking on Add Criteria, or double-clicking the title of the auto-populated option to edit.
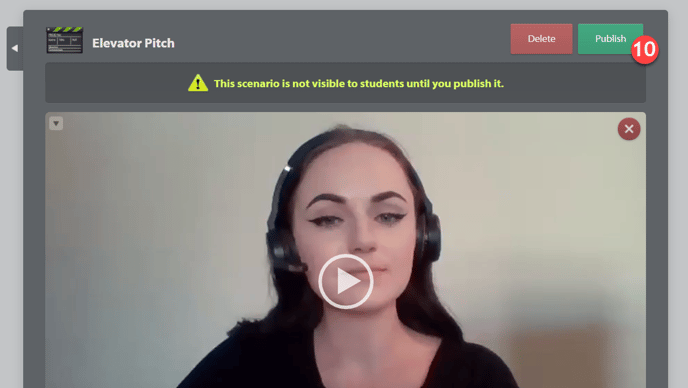
Step 10: Publish
When finished, scroll to the top and click Publish.
Step 11: Modifying after Publishing
To make any changes or edit the Scenario, click Un-publish. When finished, click Publish again.
Work in Progress:
Video Guide: Step by Step