Storyline 3 /360 xAPI Overview
This process supports the v 1.0 approach to Storyline xAPI setup and has since been updated. Check out this post for newer files using xAPI
***All template files are tested using modern browsers, such as Chrome and Firefox. We do not support or test using Internet Explorer.***
eLB xAPI templates provide a starting point for users to get into using xAPI. So, let's work through how we're making our statements so you can extend or change them as you see fit.
First, let's just walk through what's happening in this file broadly before we get into any level of detail. This specific file is a 4-tab interaction. It will function the same as most other templates in this family. When it loads, several xAPI variables will set in the background. When a user clicks one of the tabs, a series of triggers will happen, setting another number of xAPI variables, then firing some Javascript to send our statement to the LRS.
All of the variables we're using for statements have an underscore and xAPI appended. We'll be setting and resetting these throughout the interaction, so you can ignore default values. Any variables that will remain the same throughout the interaction are set when the slide loads. The remainder will change when a trigger fires a statement.
baseURL_xAPI – this should really be the same value you use in the publish identifier. We’re using the web URL where the template is hosted for this value. Don’t include an http:// here. We’ll add it to the beginning when the statement fires (same goes for publish ID; Storyline handles it like that too…we’re following).
objectID_xAPI – this is a slide-level identifier. This value should really be the same as the unique ID Storyline assigns to that slide. We’ve pre-populated this value for these specific files, but it can be found by opening the tincan.xml file and reviewing the content SL creates on publish. Check out our documentation on tool quirks for more information.
objectDescription_xAPI – this is the Description you’d like to use in the LRS. It’s probably a good idea to use something a bit more contextual and descriptive than we have. You can place anything here.
To change the values of these, and all xAPI variables, simply click and edit. Check the ADL github or speak with your favorite LRS about best practices with statements and formatting.
Now let's look at our main triggers. When a learner clicks one of the tabs we set the remaining variables necessary to complete our statement, and fire it.
verbID_xAPI - this is the URL for the verb you'd like to use.
verbDisplay_xAPI - this is the actual text you'd like the LRS to read out for the verb you’re using. (e.g., “clicked”)
contentID_xAPI - this is the specific object (button, etc.) interacted with, in URL format (e.g. “/tab-2”)
contentName_xAPI - this is how you'd like the content to be shown - in plain-text - in your LRS (e.g. "Tab 2")
From here, it's all interaction-specific until we hit that last Execute Javascript trigger. It’s a simple-enough thing, really.
baseURL_xAPI, objectID_xAPI, and contentID_xAPI get strung together to create a unique Object ID for whatever element is being clicked.
baseURL_xAPI =
http://elearningbrothers.com/xAPItmp/APPLETREE/9430968
objectID_xAPI =
/6eeuKampKnb
contentID_xAPI =
/Tab-2
statement object ID: http://elearningbrothers.com/xAPItmp/APPLETREE/9430968/6eeuKampKnb/Tab-2
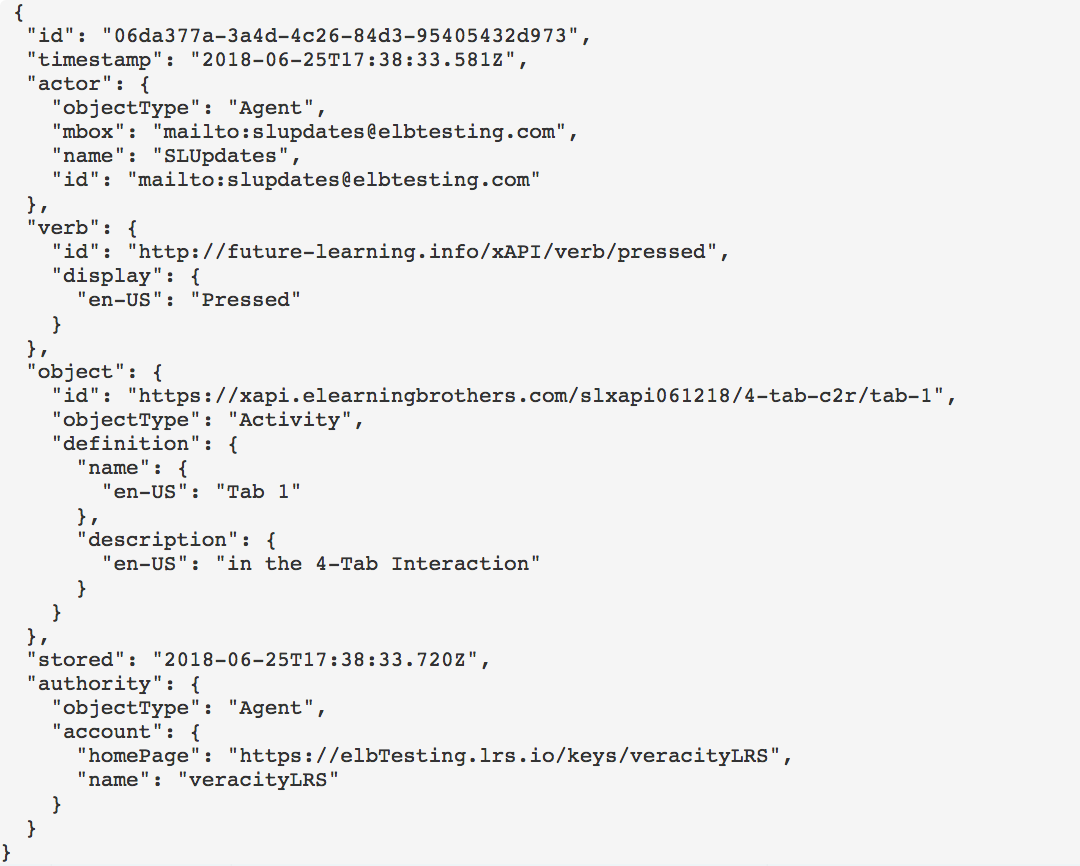
Then, we format a simple, clean statement using the remaining xAPI variables. When this script fires, you should produce a statement something like the following:
This article last reviewed Nov, 2018. The software may have changed since the last review.

