Using Built-in Storyline 2 Skins
Follow these steps below to implement our awesome Storyline 2 custom players into your course:
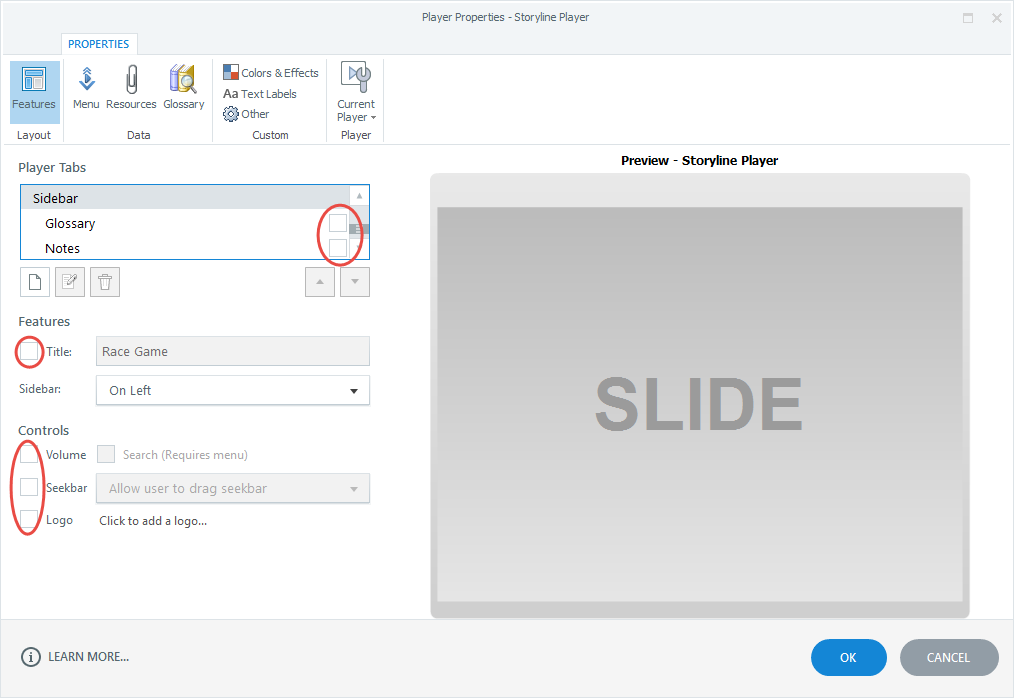
The first step in inserting the custom player is editing the built in player to be completely empty. So all the checkmarks and views that can normally be added in the player need to be taken off. The custom player will have all of these features built in.
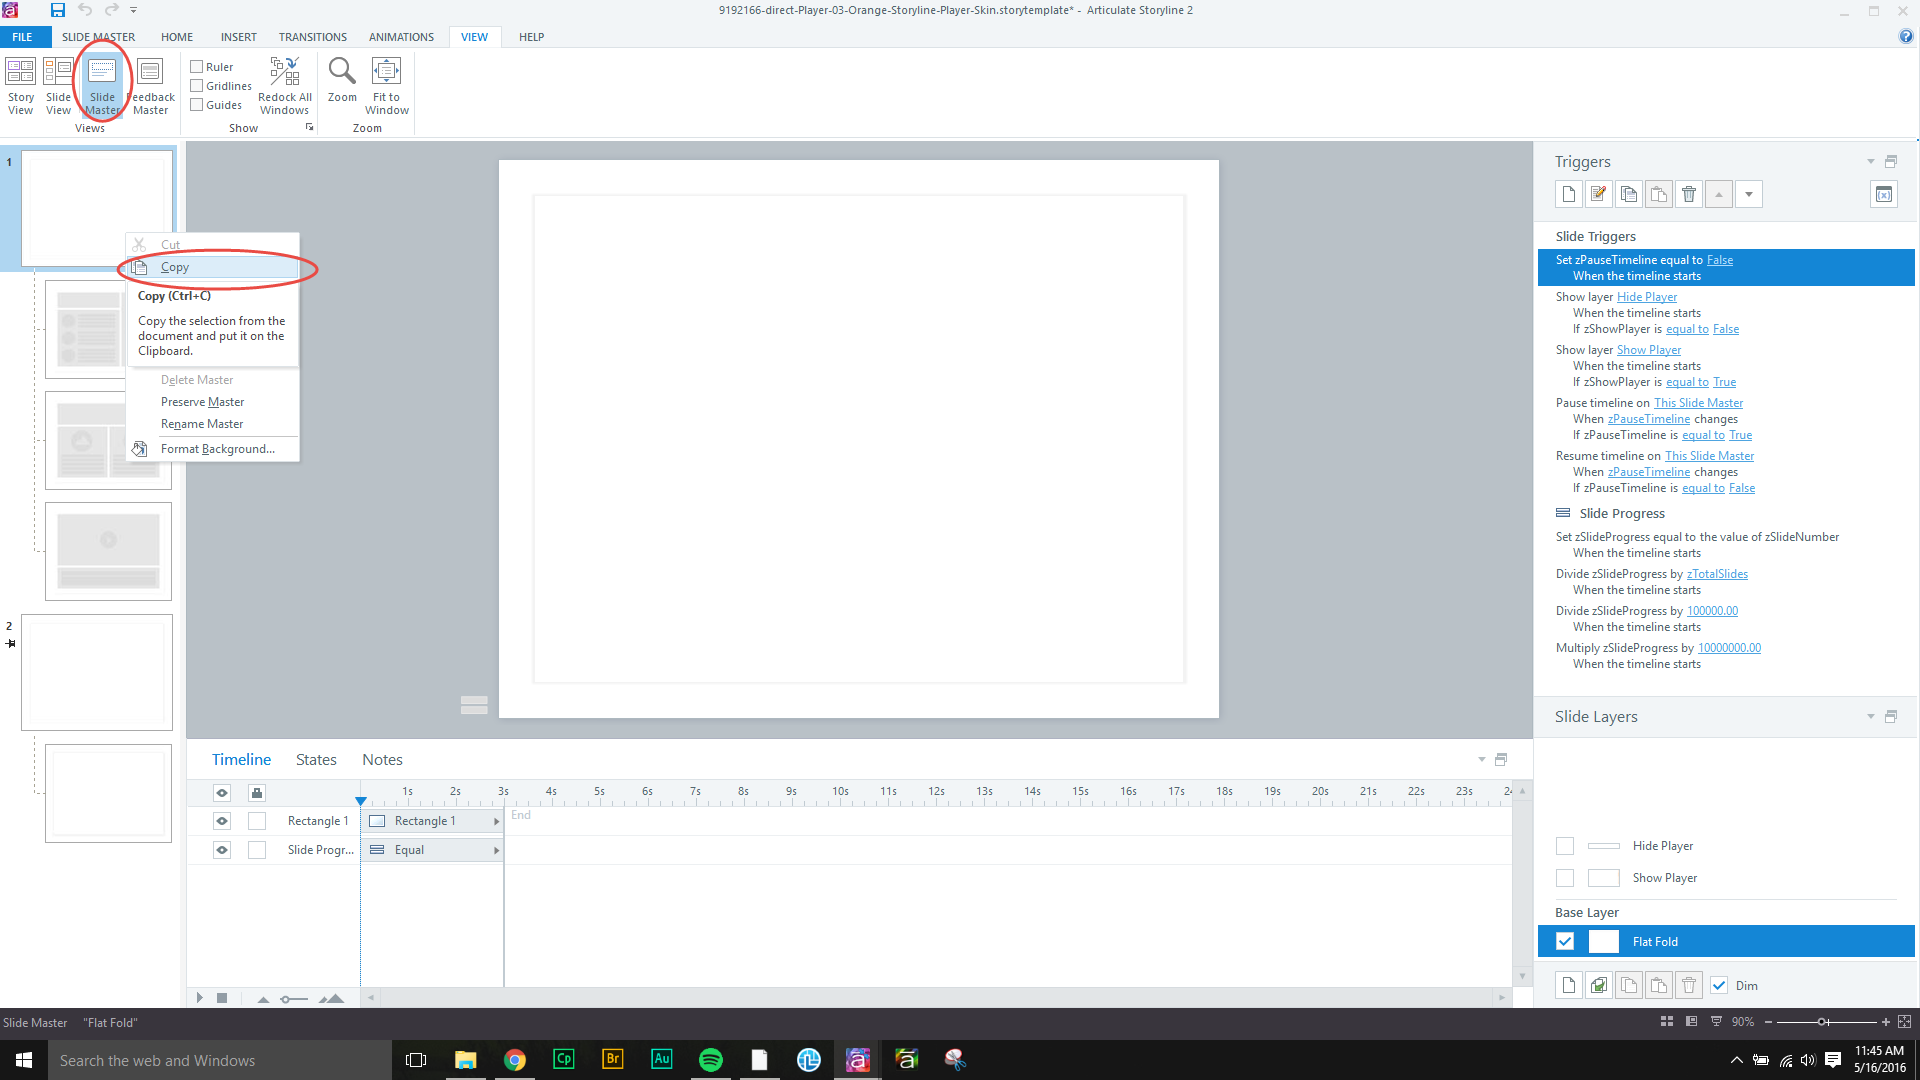
The next step is to go to the Slide Master View in the custom player project, and right click on the top layout box found in the left hand corner and copy and paste it into the Slide Master View of your personal project. After you have pasted the layout into your Slide Master you will see lots of broken links and triggers. Don’t worry, all of those will take care of themselves in a few steps. Now right click on the canvas in your base layer and assign it the layout of the player that you just imported.
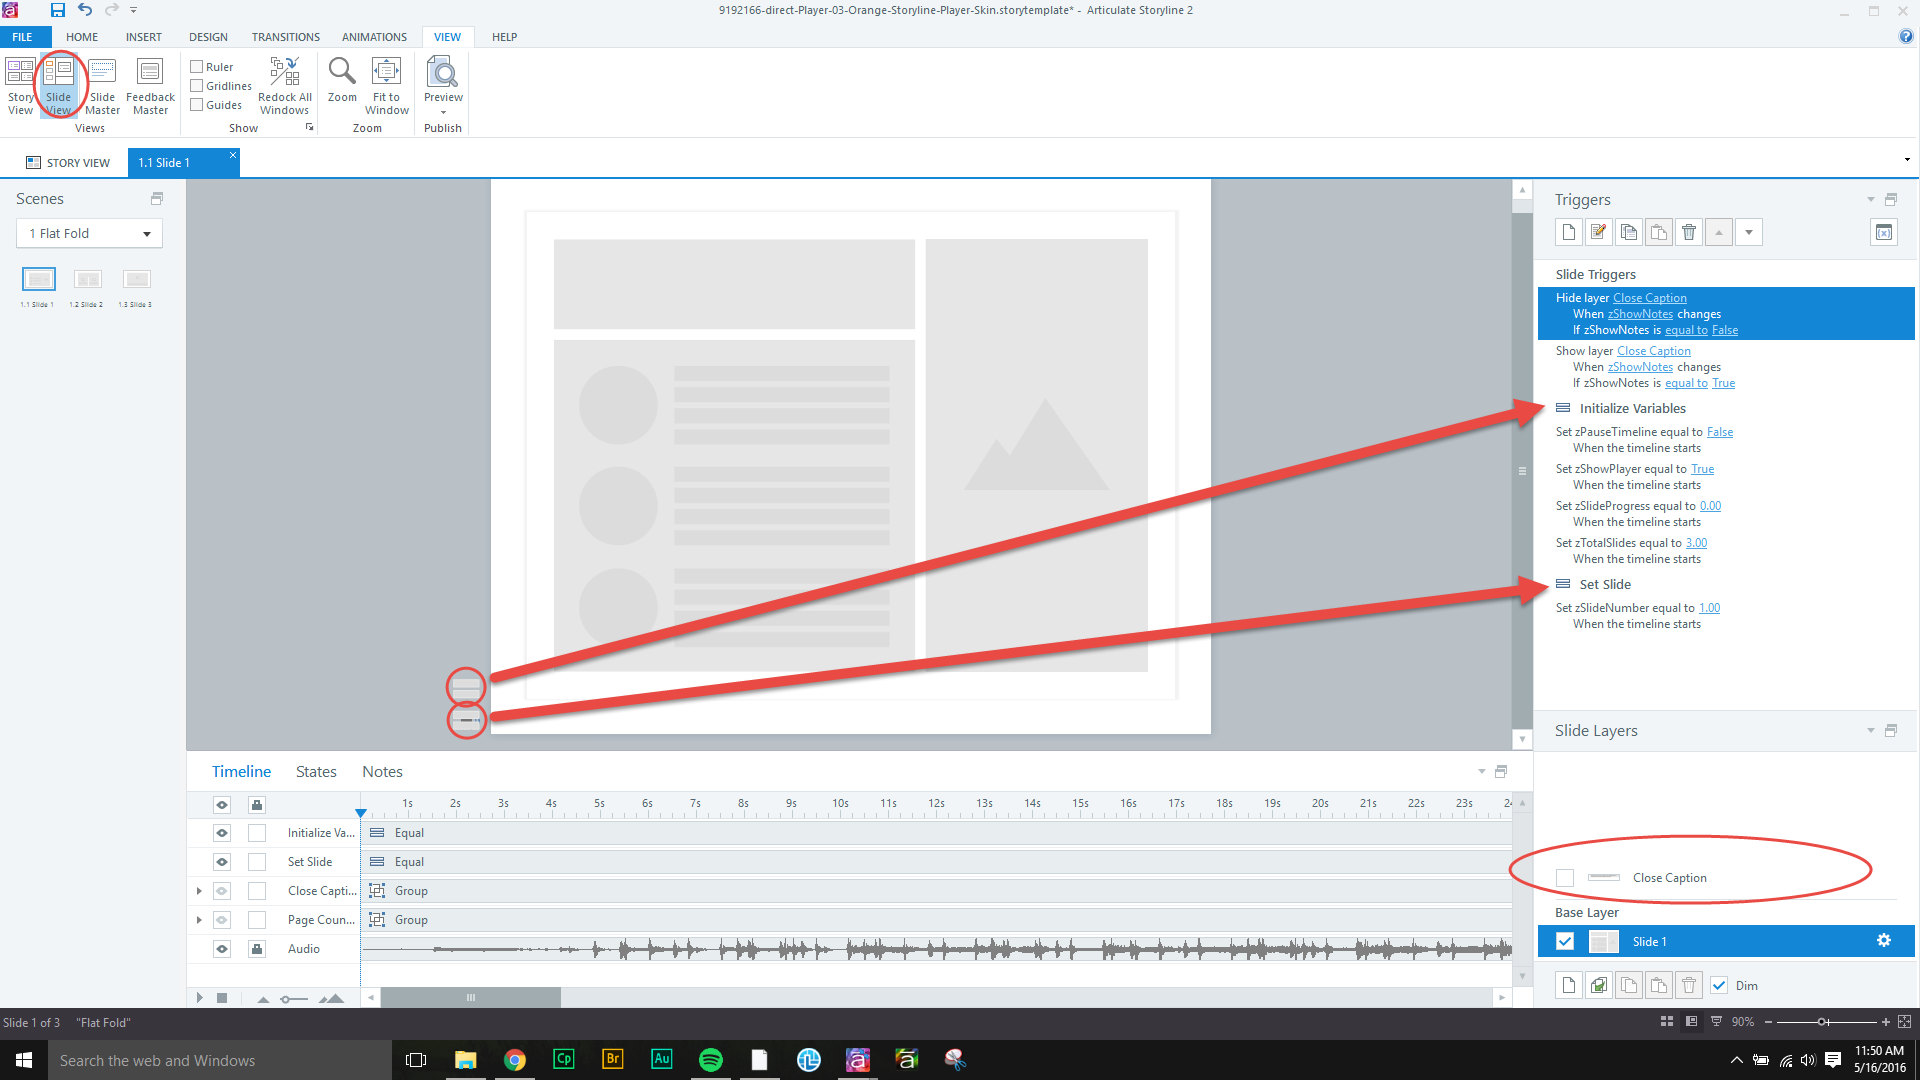
Now in the Slide View in Slide 1.1 you will want to copy the two shapes to the lower left (these are the “Initialize Variable” shape and the “Set Slide” shape) of the canvas and paste those into the Base Layer of your personal project. You will have to also copy and paste the “Set Slide” shape onto every slide so that the Slide Number will go up on each slide change. You will also need to copy the Close Caption Layer into your personal project as well. Now if you go and look in the Slide Master View at all the previously broken triggers, you will see that all of the variables and triggers have been copied and pasted from the custom player project; meaning that you now have no broken triggers found in your project.
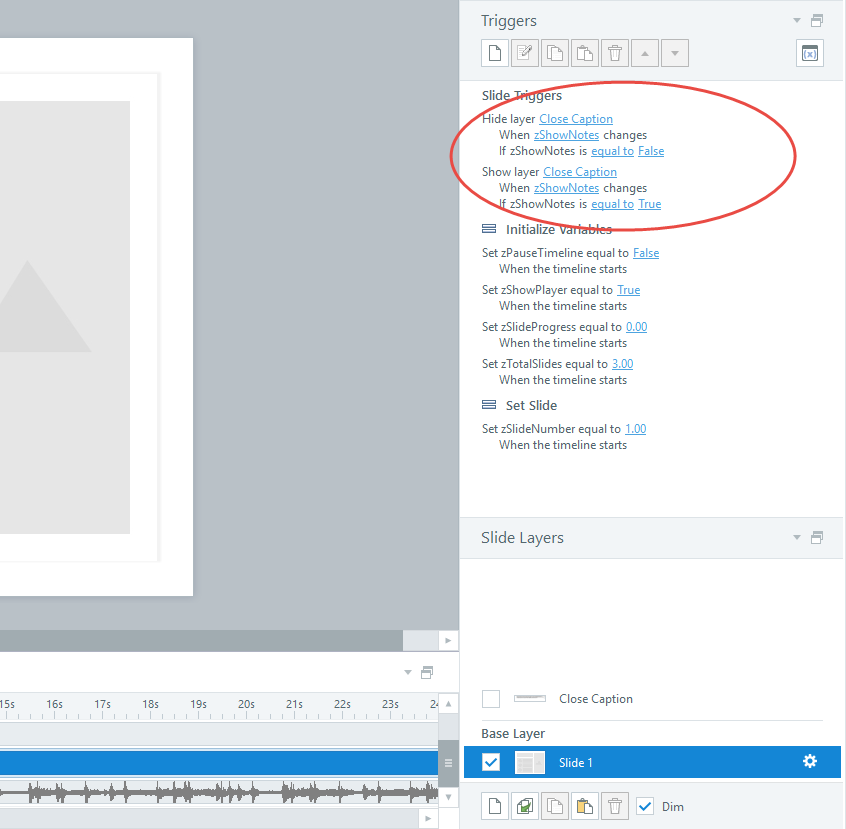
You now need to copy and paste these two Slide Triggers onto every slide and layer. This will allow you to show and hide the Close Caption layer on each layer. After you copy and paste the Triggers on the each slide you now need to reassign the “unassigned” trigger to “Close Caption”.
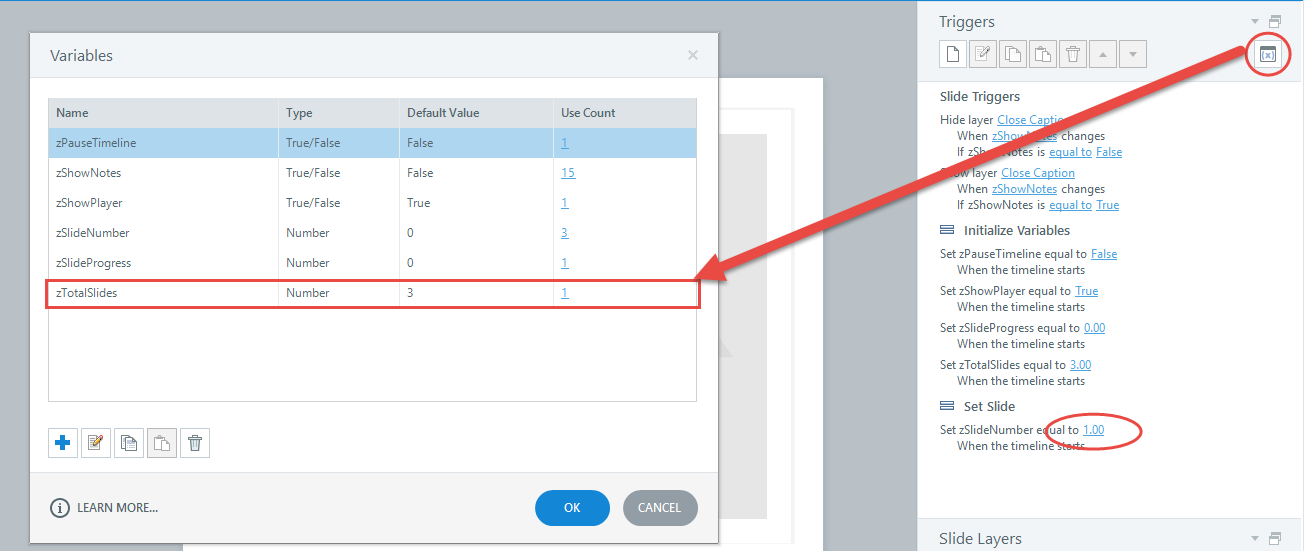
The last step is to go to the Manage Variables button and modify the variable zTotalSlides to the number of slides you have in your personal project. And then, you have to go to each individual slide and modify the trigger on the Set Slide shape to equal the number of the slide it is on. For example if you went to Slide 56, you would have to change the trigger on the Set Slide shape from 1 (which is its default state) to 56.
And that is how to import the amazing custom eLearning Brothers player into your project. Now that the player is imported, you can edit the look and feel and position it any which way you would like.
