July 12, 2022
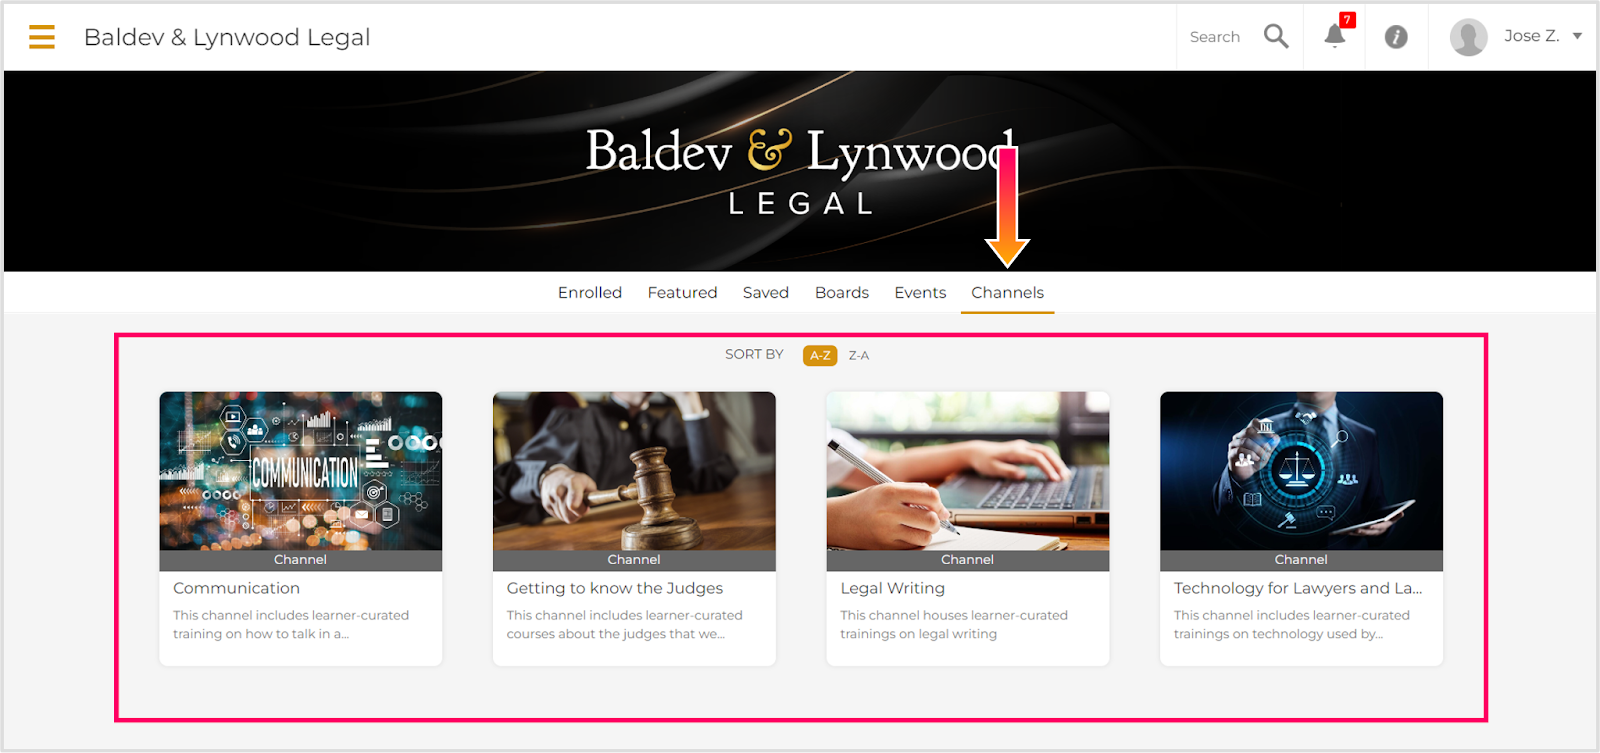
The Channels Page on the User Portal
To view a Channel as a user, navigate to the Home page of the User Portal. Select the “Channels” tab to view all Channels that share a learner group with the user.
Caution: Users will not be able to see a Channel unless they either share a learner group with the Channel or they share a learner group with content (i.e. a module or course) in the Channel.
Caution: If Channels are not enabled (see Enabling, Creating, Editing, Deleting, and Maintaining Channels), the Channels tab will not appear and learners will not be able to access any Channels.
Note: Learners can view closed captioning or listen to audio in different languages by selecting the settings icon in the video player. Users can also translate text modules by clicking on the language icon in the upper right-hand corner.
Note: Administrators can access the User Portal by selecting the drop-downdrop-dwon in the upper right and then selecting “Go to user page).
Contributing to a Channel
Any learner who shares a learner group with a Channel can create content for and contribute to that Channel using the built-in microlearning module builder.
Note: Users do not need to have administrative permissions to add content to a Channel.
Related: For more information about enabling Channels, visit Enabling, Creating, Editing, Deleting, and Maintaining Channels.
Step 1: Open Microlearning Module Builder
Navigate to the Channel page of the User Portal. Select the Channel you wish to edit and then select the red "Contribute" button.
Step 2: Build Microlearning Module
Use the microlearning module to build the module. There is no limit to how much content can be added to the microlearning module. Simply select the “+” icon between sections to add a new section.
Note: The module that you create will automatically be assigned to all learner groups assigned to the Channel.
Note: Only the user that created the module will be able to edit the content in their modules. However, administrators can delete user-created modules and change information such as learner groups. For more information, visit Enabling, Creating, Editing, Deleting, and Maintaining Channels.
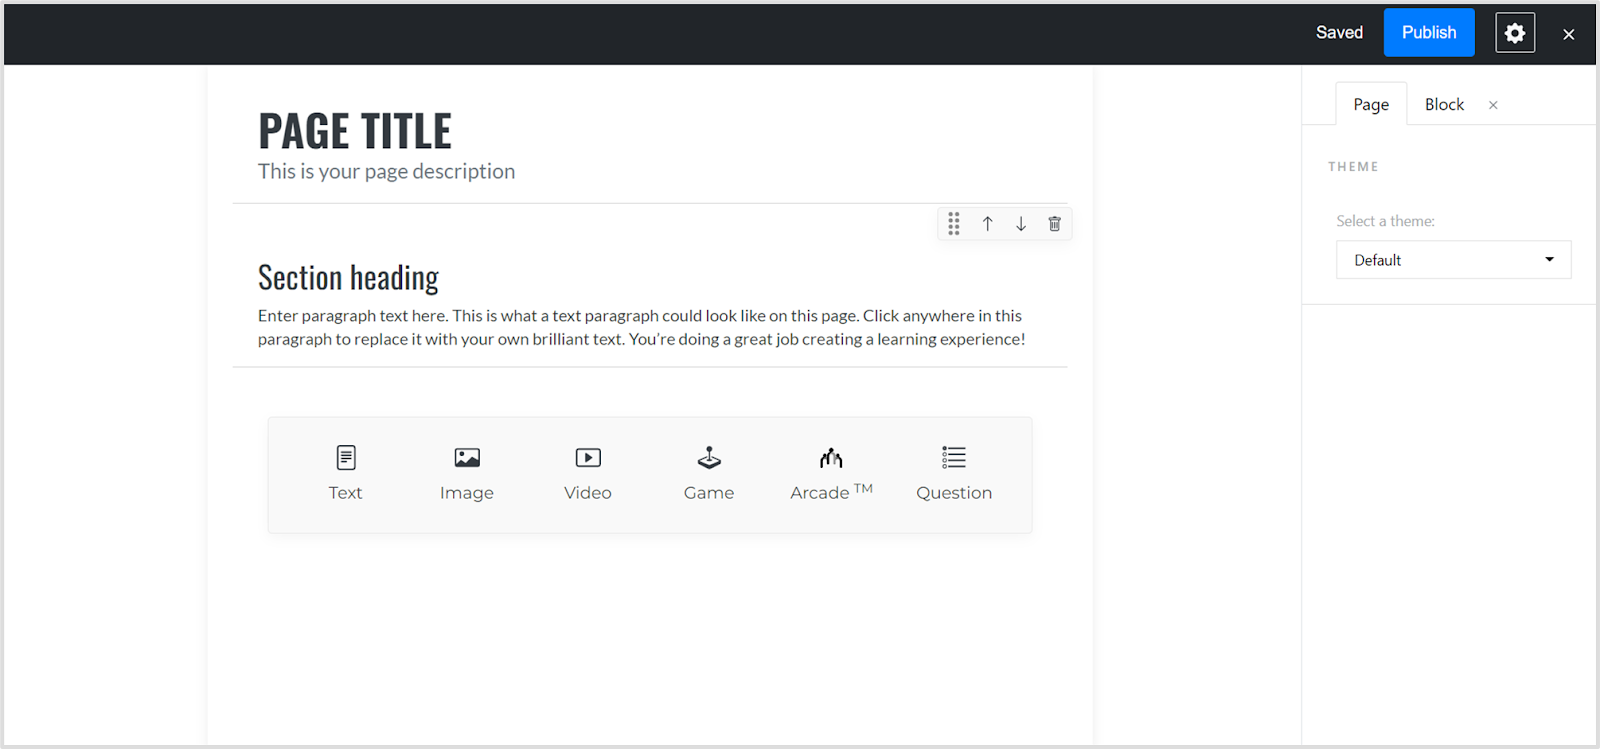
Title and Description:
Add a title and description to the course by clicking on and then typing in those fields.
Theme Drop Down:
You can choose your theme by clicking on the drop-down in the upper right-hand corner. This will change the color and font of your module.
Content:
Select the text, image, video, game, CenarioVR, ArcadeTM, or question icons to add content to your module.
Note: The game, CenarioVR, and ArcadesTM content options are premium features. To learn more, go to our website.
- Text: You can use this to add text to your microlearning module. Users can translate text modules by selecting the language icon in the upper right-hand corner.
- Image: Add images to your microlearning module by uploading them from your device.
- Video: Choosing the video icon will allow you to upload a video from your device, record a video, add a YouTube video, or record a screen capture. When users view the video, they will be able to translate it into Spanish, Italian, and Portuguese. Users can also turn on closed captioning.
- CenarioVR: Choosing the CenarioVR option will allow you to add a virtual reality module to your module.
- Game: Add interactive games to your microlearning module from The Training Arcade™. You can choose published games directly from your Training Arcade™ library.
- ArcadesTM: Add a robust gamification dashboard with in-depth analytics, leaderboards, and other gamification with the ArcadesTM content button.
Related: To learn more about how to use the microlearning model builder, visit Creating and Editing a Microlearning Module.