Creating an Assignment
Step by step guide to creating an Assignment in the Rehearsal platform.
Note from the Product Manager
At Rehearsal, our commitment is to iteratively enhance your experience by introducing new features that align with evolving technologies. As a result, the guide you are about to read may differ in appearance or functionality from the current version of Rehearsal. We appreciate your patience as we work diligently to update our product documentation.
If you are running into specific issues, feel free to reach out to support@elblearning.com
April 06, 2022
Written Guide: Step by Step
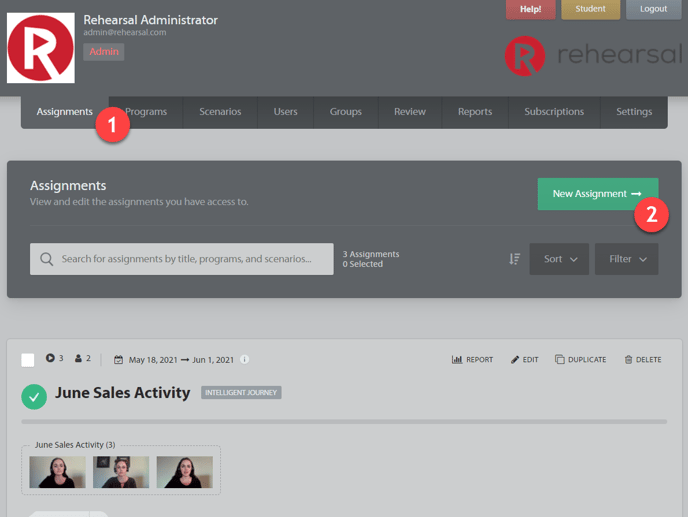
Step 1: Assignment Tab
Begin by clicking on the Assignments tab.
Step 2: Create Assignment container
Click on New Assignment.
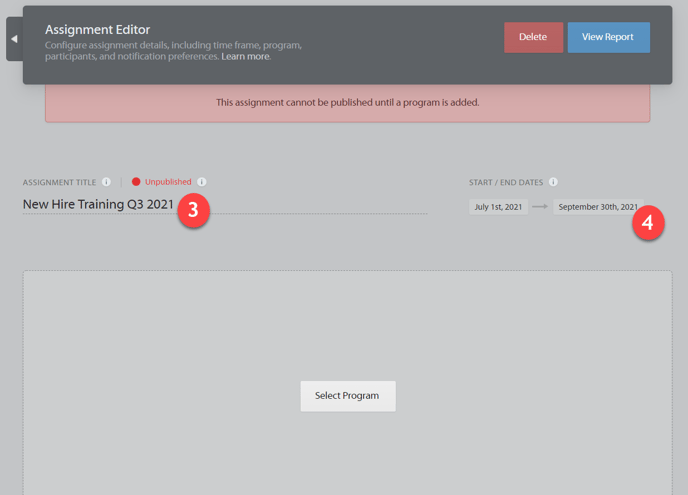
Step 3: Add Title
Add a title to the Assignment.
Step 4: Course Duration
Select the start date and time as well as the end date and time.
Step 5: Program Selector
Click on Select Program to choose the Program you'd like to use for this Assignment.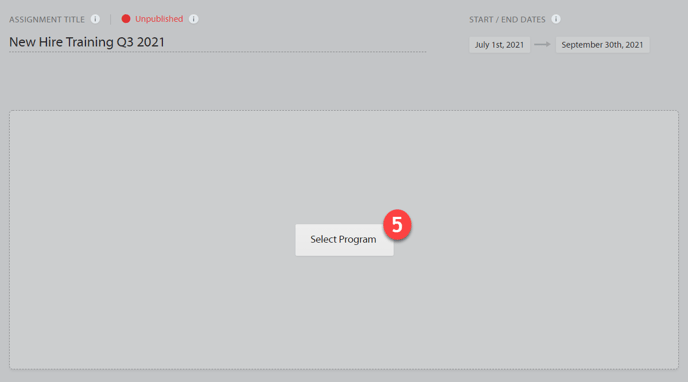
Step 6: Choose Program
Select the Program you'd like to use, then click Done. To learn how to create Programs, please refer to the How to Create a New Program - Standard article here and/or How to Create a New Program - Intelligent Journey here.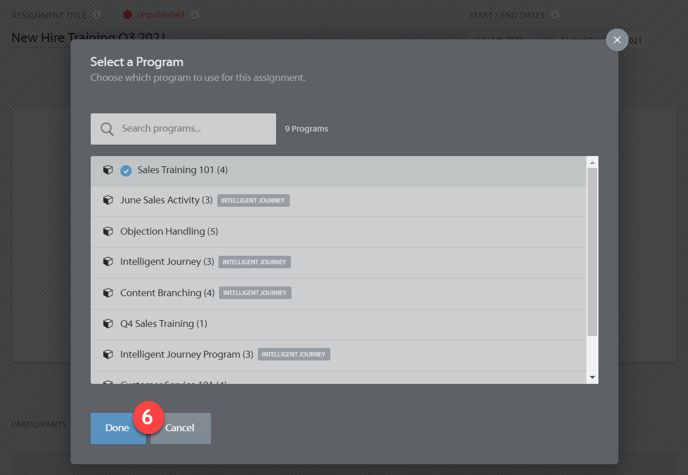
Step 7: Create Cohort
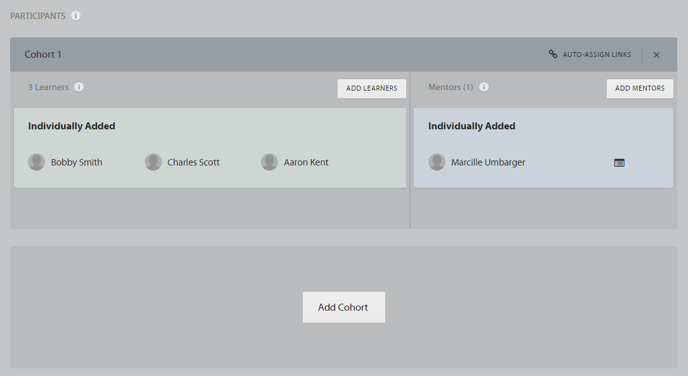
Once you've added a Program, move onto adding Learners and Mentors by clicking on Add Cohort.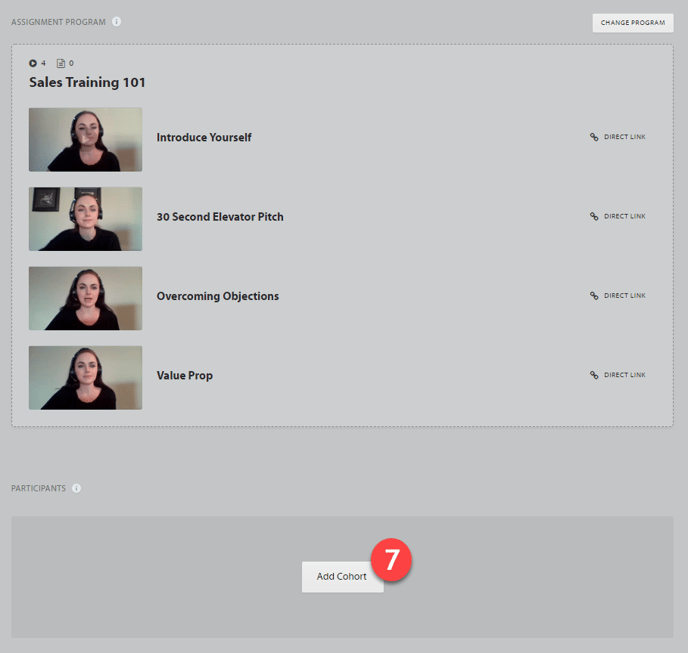
Step 8: Learner Selector
First, add Learners by clicking on Assign Learners.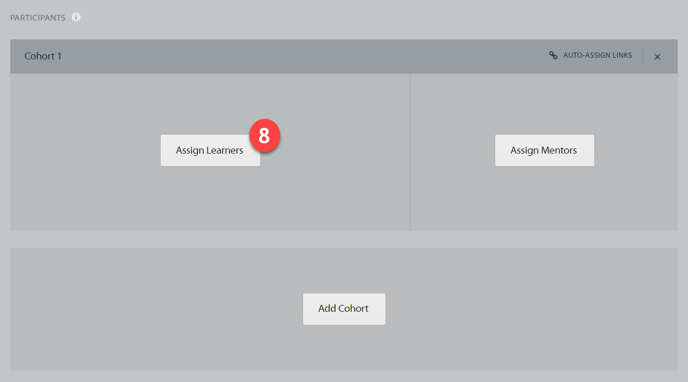
Step 9: Select Learners
In the modal that appears, select your Learners. You can add individual users or Groups. Once you've made your selection, click on Done Selecting Users.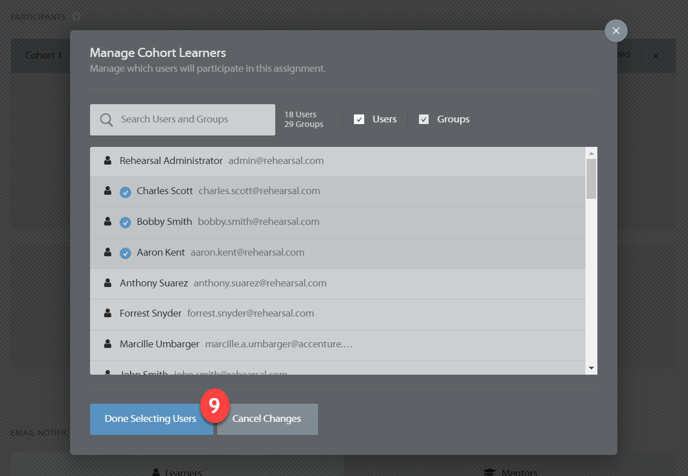
Step 10: Mentor Selector
Next, add Mentors by clicking on Assign Mentors.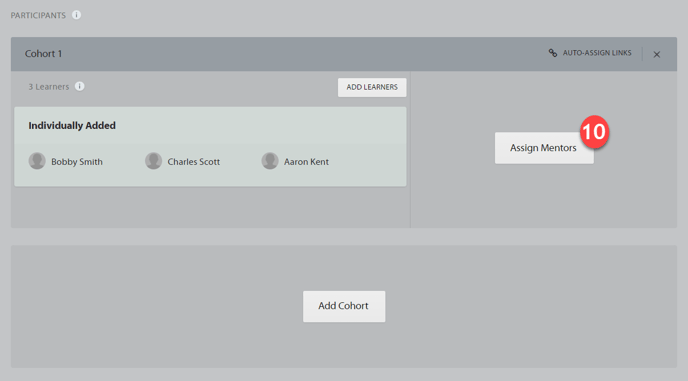
Step 11: Select Mentors
In the modal that appears, select your Mentors. You can add individual users or Groups, as well as User-Specific, Group-Specific, and Program-Specific Mentors. Once you've made your selection, click on Done Selecting Users.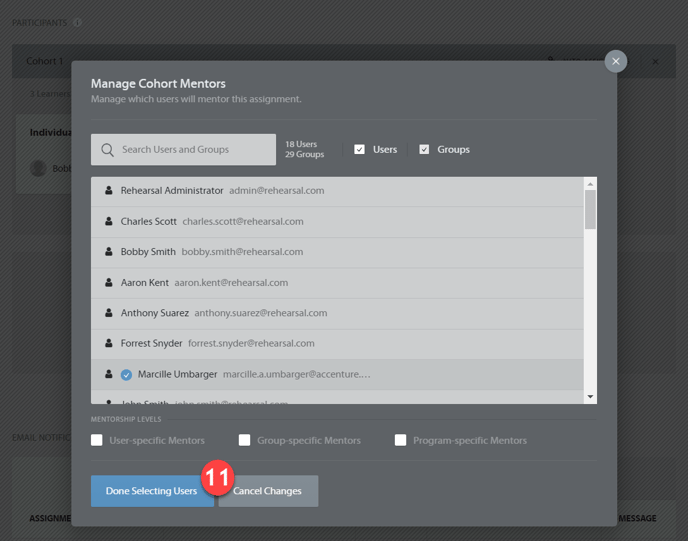
Step 12: Notification Settings for Learners
Once you have assigned Learners and Mentors, move onto the Assignment notifications. The first view you'll see is Learner notifications. If there are any email notifications you do not want to go out for this Assignment, uncheck them.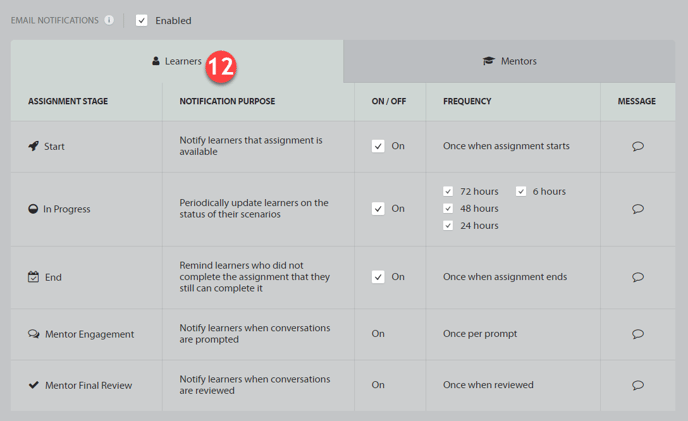
Step 13: Notification Settings for Mentors
Click on the Mentors tab to view the Mentor notifications. If there are any email notifications you do not want to go out for this Assignment, uncheck them.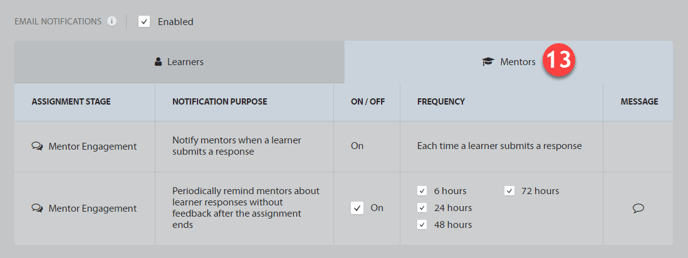
Step 14: Designate Assignment Editors
Next, you can add Assignment Editors.
Step 15: Add Tags
You may also add Assignment Tags.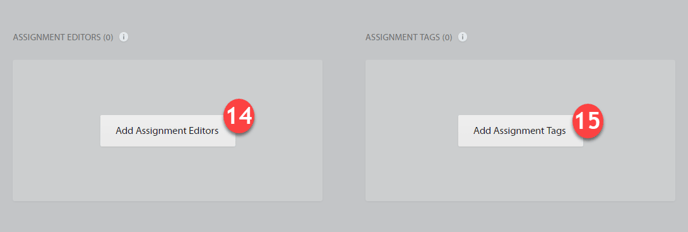
Step 16: Finalize and Publish
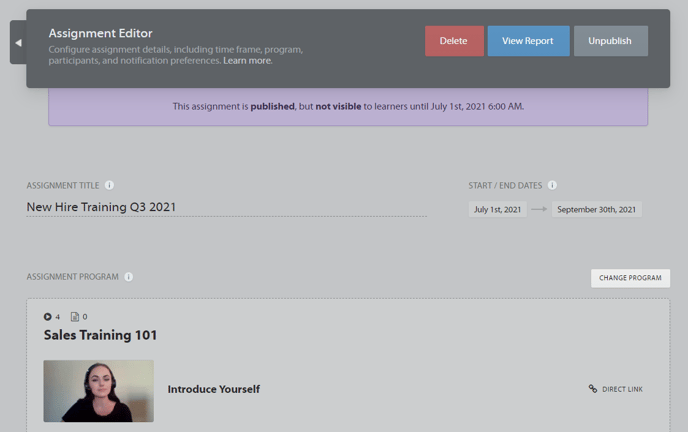
Once you are finished building out the Assignment to its entirety, scroll up to the top of the Assignment and click Publish.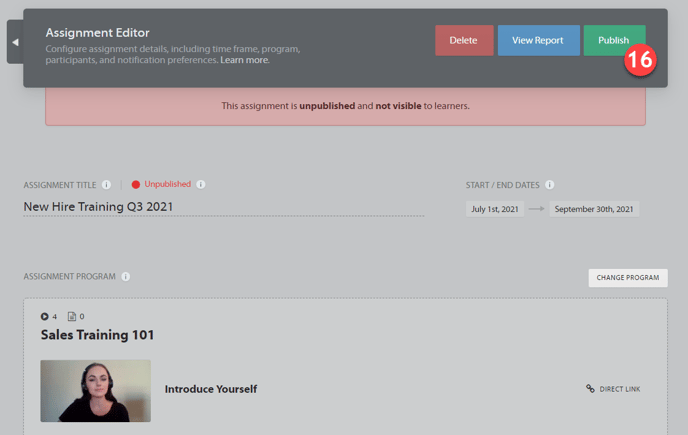
Work in Progress
Video: Step by Step
